Day 14: Trove – yet another TAP harness

Since the early Pheix versions, I have paid a lot of attention to testing system. Initially it was a set of unit tests – I tried to cover a huge range of units like classes, methods, subroutines and conditions. In some cases I have combined unit and functional testing within one .t file, like it’s done to verify Ethereum or API related functionality.

Tests became a bit complicated and environment dependent. For example off chain testing like trivial prove6 -Ilib ./t should skip any Ethereum tests including some API units, but not API template engine or cross module API communications. So I had to create environment dependent configurations and since that point I started yet another Pheix friendly test system.

It was written in pure bash and was included in Pheix repository for a few years.

In a middle of June 2022, I introduced Coveralls support and got a few requests to publish this test tool separately from Pheix. Consider that moment as a Trove module birth baby

Contributions are greatly appreciated: https://github.com/pheix/raku-trove.

Concepts

Generally Trove is based on idea to create yet another prove6 application: the wrapper over the unit tests in t folder. But with out-of-the-box Github and Gitlab CI/CD integration, extended logging and test-dependable options.

Trove includes trove-cli script as a primary worker for batch testing. It iterates over pre-configured stages and runs specific unit test linked to the stage. trove-cli is console oriented – all output is printed to STDOUT and STDERR data streams. Input is taken from command line arguments and configuration file.

Command line arguments

Colors

To bring colors to the output -c option is used:

trove-cli -c --f=`pwd`/run-tests.conf.yml --p=yq

By default this feature is switched off – actually colors are good at manual tests. But since you use runner on GitLab, activated colors could break the coverage collection. Gitlab parses output with the predefined regular expression and if colors are switched on, this feature breaks: colors for text are represented by color codes and these codes somehow impact coverage parsing.

Stages management

To exclude specific stages from test -s option is used:

trove-cli -c --s=1,2,4,9,10,11,12,13,14,25,26 --f=`pwd`/run-tests.conf.yml --p=yq

File processor configuration

trove-cli takes test scenario from configuration file. Default format is JSON, but you can use YAML on demand, for now JSON::Fast and YAMLish processing modules (processors) are integrated. To switch between the processors the next command line options should be used:

  • --p=jq or do not use --p (default behavior) – JSON processor;
  • --p=yqYAML processor.

Versions consistency

To verify the version consistency on commit, the next command line options should be used:

  • -g – path to git repo with version at latest commit in format %0d.%0d.%0d;
  • -v – current version to commit (in format %0d.%0d.%0d as well).
trove-cli -c --g=~/git/raku-foo-bar --v=1.0.0

At Pheix test suite trove-cli pushes versions defined by -g and -v options to ./t/11-version.t test. The next criteria are verified there: version at latest commit from repo by -g path is lower than -v version by 1 (at one of major, minor or patch members) and -v version equals the version defined at Pheix::Model::Version.

You can try it on v0.13.116:

trove-cli -c --f=`pwd`/run-tests.conf.yml --p=yq --g=`pwd` --v=0.13.117
...
# Failed test 'curr git commit ver {0.13.117} and Version.pm {0.13.116} must be equal'
# at ./t/11-version.t line 25
# Failed test 'prev git commit ver {0.13.116} and Version.pm {0.13.116} must differ by 1.0.0 || x.1.0 || x.x.1'
# at ./t/11-version.t line 39
# You failed 2 tests of 6
# Failed test 'Check version'
# at ./t/11-version.t line 21
# You failed 1 test of 1
13. Testing ./t/11-version.t                               [ FAIL ]
[ error at stage 13 ]

Version consistency check is used at commit-msg helper to verify the version given by committer in commit message:

commit 5d867e4e15928ef7a98f07c8753033339aa5cf7f
Author: Konstantin Narkhov 
Date:   Sun Dec 4 17:16:07 2022 +0300

    [ 0.13.116 ] Set Trove as default test suite

    1. Use Trove in commit-msg hook
    2. Set Trove as default test suite

Target configuration file

By default the next configuration targets are used:

  • JSON – ./x/trove-configs/test.conf.json;
  • YAML – ./x/trove-configs/test.conf.yaml.

These paths are used to test Trove itself with:

cd ~/git/raku-trove && bin/trove-cli -c && bin/trove-cli -c --p=yq

You have to specify another configuration file via -f option:

trove-cli --f=/tmp/custom.jq.conf

First stage logging policy

trove-cli is obviously used to test Pheix. First Pheix testing stage checks www/user.rakumod script with:

raku $WWW/user.raku --mode=test # WWW == './www'

This command prints nothing to standard output and eventually nothing is needed to be saved to log file. By default first stage output is ignored. But if you use Trove to test some other module or application, it might be handy to force save first stage output. This is done by -l command line argument:

trove-cli --f=/tmp/custom.jq.conf -l

In case the stage with blank output is not skipped it’s taken into coverage scope but marked as WARN in trove-cli output:

01. Testing ./www/user.raku                                [ WARN ]
02. Testing ./t/cgi/cgi_post_test.sh                       [ 6% covered ]
...

Origin repository

By default origin repository is set up to git@github.com:pheix/raku-trove.git and you can change it to any value you prefer by -o argument:

trove-cli --f=/tmp/custom.jq.conf --o=git@gitlab.com:pheix/net-ethereum-perl6.git

It might be handy for displaying git related details about your project at Coveralls.

Configurations

Trivial test configuration example

Trivial multi-interpreter one-liner test configuration file is included to Trove:

target: Trivial one-liner test
stages:
  - test: raku  -eok(1); -MTest
  - test: perl6 -eis($CONSTANT,2); -MTest
    args:
      - CONSTANT
  - test: perl  -eok(3);done_testing; -MTest::More

Test command to be executed:

CONSTANT=2 && trove-cli --f=/home/pheix/pool/core-perl6/run-tests.conf.yml.oneliner --p=yq -c

Command output messages:

01. Testing -eok(1,'true');                                [ 33% covered ]
02. Testing -eis(2,2,'2=2');                               [ 66% covered ]
03. Testing -eok(3,'perl5');done_testing;                  [ 100% covered ]
Skip send report to coveralls.io: CI/CD identifier is missed

Pheix test suite configuration files

Pheix test suite configuration files have a full set of features we talked above: stages, subtages, environmental variables export, setup and clean up. These files (JSON, YAML) could be used as basic examples to create test configuration for yet another module or application, no matter – Raku, Perl or something else.

Sample snippet from run-tests.conf.yml:

target: Pheix test suite
stages:
  - test: 'raku $WWW/user.raku --mode=test'
    args:
      - WWW
  - test: ./t/cgi/cgi_post_test.sh
    substages:
      - test: raku ./t/00-november.t
  ...
  - test: 'raku ./t/11-version.t $GITVER $CURRVER'
    args:
      - GITVER
      - CURRVER
  ...
  - test: raku ./t/17-headers-proto-sn.t
    environment:
      - export SERVER_NAME=https://foo.bar
    cleanup:
      - unset SERVER_NAME
    substages:
      - test: raku ./t/17-headers-proto-sn.t
        environment:
          - export SERVER_NAME=//foo.bar/
        cleanup:
          - unset SERVER_NAME
  - test: raku ./t/18-headers-proto.t
    substages:
      - test: raku ./t/18-headers-proto.t
        environment:
          - export HTTP_REFERER=https://foo.bar
        cleanup:
          - unset HTTP_REFERER
  ...
  - test: raku ./t/29-deploy-smart-contract.t

Test coverage management

Gitlab

Coverage percentage in Gitlab is retrieved from job’s standard output: while your tests are running, you have to print actual test progress in percents to console (STDOUT). Output log is parsed by runner on job finish, the matching patterns should be set up in .gitlab-ci.yml – CI/CD configuration file.

Consider trivial test configuration example from the section above, the standard output is:

01. Running -eok(1,'true');                              [ 33% covered ]
02. Running -eis(2,2,'2=2');                             [ 66% covered ]
03. Running -eok(3,'perl5');done_testing;                [ 100% covered ]

Matching pattern in .gitlab-ci.yml is set up:

...
trivial-test:
  stage: trivial-test-stable
  coverage: '/(\d+)% covered/'
  ...

To test your matching pattern with Perl one-liner, save your runner’s standard output to file, e.g. /tmp/coverage.txt and run a command:

perl -lne 'print $1 if $_ =~ /(\d+)% covered/' <<< cat /tmp/coverage.txt

You will get:

33
66
100

The highest (last) value will be used by Gitlab as the test coverage value in percents for your test. Example with the 100% coverage results for Pheix:

Coveralls

Basics

Coveralls is a web service that allows users to track the code coverage of their application over time in order to optimize the effectiveness of their unit tests. Trove includes Coveralls integration via API.

API reference is quite clear – the generic objects are job and source_file. Array of source files should be included to the job:

{ "service_job_id": "1234567890", "service_name: "Trove::Coveralls", "source_files": [ { "name": "foo.raku", "source_digest": "3d2252fe32ac75568ea9fcc5b982f4a574d1ceee75f7ac0dfc3435afb3cfdd14", "coverage": [null, 1, null] }, { "name": "bar.raku", "source_digest": "b2a00a5bf5afba881bf98cc992065e70810fb7856ee19f0cfb4109ae7b109f3f", "coverage": [null, 1, 4, null] } ] }

In example above we covered foo.raku and bar.raku by our tests. File foo.raku has 3 lines of source code and only line no.2 is covered. File bar.raku has 4 lines of source code, lines no.2 and no.3 are covered, 2nd just once, 3rd – four times.

Test suite integration

Coverage concept

The basic idea behind Trove and Coveralls integration is that we do not cover lines of source files. We assume that unit test is a black box and it covers all target functionality – if unit test run is successful, we mark some part of our software as covered, otherwise – this part is out of order.

Number of unit tests should be equal to the parts of the testing software and in case of all successful tests, we mark the whole software as tested and all source code as covered.

Of course, this concept has a bottleneck. Since the unit test is considered as a black box, we can not guarantee its quality at all. In worst case it could be just a stub, with no any test logic behind.

From other hand, TAP concept does not require line-by-line testing – maintainer decides how much tests should be developed to cover the software functionality. And of course, we do not expect blank or non-functional unit tests – all of them should really work and if we can not cover some complicated logic/algorithm by single unit test, we should use a few separated ones.

Integration details

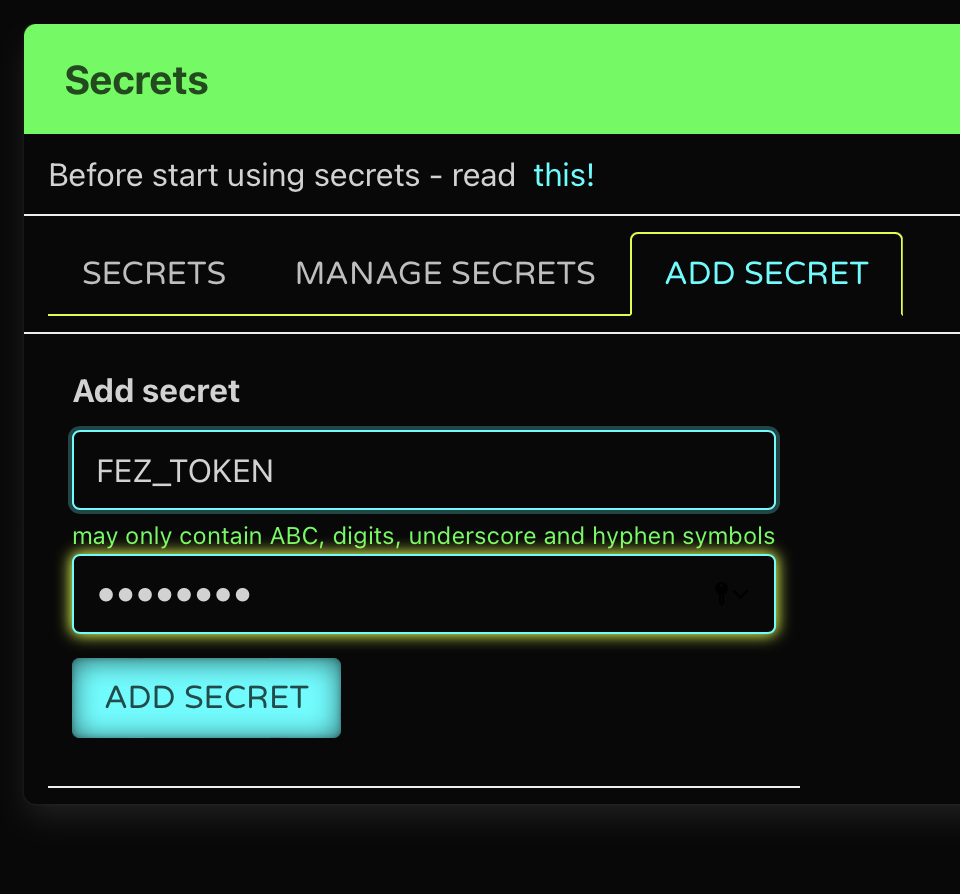
We use secret token to request Coveralls via API. Since the Gitlab runner is used for testing, secret token is stored as protected and masked variable.

As it was described in coverage concept section, we assume full coverage for some software part if its unit test is passed. Obviously this part is presented by its unit tests and source_files section in Coveralls request looks like:

... "source_files": [ { "name": "./t/01.t", "source_digest": "be4b2d7decf802cbd3c1bd399c03982dcca074104197426c34181266fde7d942", "coverage": [ 1 ] }, { "name": "./t/02.t", "source_digest": "2d8cecc2fc198220e985eed304962961b28a1ac2b83640e09c280eaac801b4cd", "coverage": [ 1 ] } ] ...

We consider no lines to be covered, so it’s enough to set [ 1 ] to coverage member.

Besides source_files member we have to set up a git member as well. It’s pointed as optional, but your build reports on Coveralls side will look anonymous without git details (commit, branch, message, etc…).

You can check how Coveralls integration is done at the Trove::Coveralls module: https://github.com/pheix/raku-trove/blob/main/lib/Trove/Coveralls.rakumod.

Нow it looks on Сoveralls side

Project overview
Unit tests summary
Recent builds

Log test session

While testing trove-cli does not print any TAP messages to standard output. Consider trivial multi-interpreter one-liner test again:

01. Running -eok(1,'true');                              [ 33% covered ]
02. Running -eis(2,2,'2=2');                             [ 66% covered ]
03. Running -eok(3,'perl5');done_testing;                [ 100% covered ]

On the background trove-cli saves the full log with extended test details. Log file is saved to current (work) directory and has the next file name format: testreport.*.log, where * is test run date, for example: testreport.2022-10-18_23-21-12.log.

Test command to be executed:

cd ~/git/raku-trove && CONSTANT=2 bin/trove-cli --f=`pwd`/x/trove-configs/tests.conf.yml.oneliner --p=yq -c -l

Log file testreport.*.log content is:

----------- STAGE no.1 -----------
ok 1 - true

----------- STAGE no.2 -----------
ok 1 - 2=2

----------- STAGE no.3 -----------
ok 1 - perl5
1..1

Usage for any module or application

Honestly we can use trove-cli to test any software, but obviously it fits much more closely to Raku or Perl modules and applications.

Let’s try Trove with:

Acme::Insult::Lala

trove-cli is available as independent module, the first step is to install it.

zef install Trove

Next step is to clone Acme::Insult::Lala to /tmp:

cd /tmp && git clone https://github.com/jonathanstowe/Acme-Insult-Lala.git

Now we have to create Trove configuration file for Acme::Insult::Lala module. Let’s check how many unit tests this module has:

ls -la /tmp/Acme-Insult-Lala/t

# drwxr-xr-x 2 kostas kostas 4096 Oct 23 14:56 .
# drwxr-xr-x 7 kostas kostas 4096 Oct 23 15:19 ..
# -rw-r--r-- 1 kostas kostas  517 Oct 23 14:56 001-meta.t
# -rw-r--r-- 1 kostas kostas  394 Oct 23 14:56 010-basic.t

Just 001-meta.t and 010-basic.t, so the configuration file should contain:

target: Acme::Insult::Lala
stages:
  - test: raku /tmp/Acme-Insult-Lala/t/001-meta.t
  - test: raku /tmp/Acme-Insult-Lala/t/010-basic.t

Save it to /tmp/Acme-Insult-Lala/.run-tests.conf.yml and run the test:

RAKULIB=lib trove-cli --f=/tmp/Acme-Insult-Lala/.run-tests.conf.yml --p=yq -l -c

Command output messages:

01. Testing /tmp/Acme-Insult-Lala/t/001-meta.t             [ 50% covered ]
02. Testing /tmp/Acme-Insult-Lala/t/010-basic.t            [ 100% covered ]
Skip send report to coveralls.io: CI/CD identifier is missed

Log file content:

----------- STAGE no.1 ----------- 1..1 # Subtest: Project META file is good ok 1 - have a META file ok 2 - META parses okay ok 3 - have all required entries ok 4 - 'provides' looks sane ok 5 - Optional 'authors' and not 'author' ok 6 - License is correct ok 7 - name has a '::' rather than a hyphen (if this is intentional please pass :relaxed-name to meta-ok) ok 8 - no 'v' in version strings (meta-version greater than 0) ok 9 - version is present and doesn't have an asterisk ok 10 - have usable source 1..10 ok 1 - Project META file is good ----------- STAGE no.2 ----------- ok 1 - create an instance ok 2 - generate insult ok 3 - and its defined ok 4 - and 'rank beef-witted hempseed' has at least five characters ok 5 - generate insult ok 6 - and its defined ok 7 - and 'churlish rough-hewn flap-dragon' has at least five characters ok 8 - generate insult ok 9 - and its defined ok 10 - and 'sottish common-kissing pignut' has at least five characters ok 11 - generate insult ok 12 - and its defined ok 13 - and 'peevish dismal-dreaming vassal' has at least five characters ok 14 - generate insult ok 15 - and its defined ok 16 - and 'brazen bunched-backed harpy' has at least five characters ok 17 - generate insult ok 18 - and its defined ok 19 - and 'jaded crook-pated gudgeon' has at least five characters ok 20 - generate insult ok 21 - and its defined ok 22 - and 'waggish shrill-gorged manikin' has at least five characters ok 23 - generate insult ok 24 - and its defined ok 25 - and 'goatish weather-bitten horn-beast' has at least five characters ok 26 - generate insult ok 27 - and its defined ok 28 - and 'hideous beef-witted maggot-pie' has at least five characters ok 29 - generate insult ok 30 - and its defined ok 31 - and 'bootless earth-vexing giglet' has at least five characters 1..31

All updates are in my forked repo: https://github.com/pheix/Acme-Insult-Lala.

Acme

Consider that Trove was successfully installed. Now you have to download and unzip Acme to /tmp/Acme-perl5.

Next steps are equal to those ones we did for Acme::Insult::Lala:

  • check the unit tests for Acme module with ls -la /tmp/Acme-perl5/t
  • add Trove config file .run-tests.conf.yml to /tmp/Acme-perl5

Content of .run-tests.conf.yml configuration file for Acme module:

target: Perl5 Acme v1.11111111111
stages:
  - test: perl /tmp/Acme-perl5/t/acme.t
  - test: perl /tmp/Acme-perl5/t/release-pod-syntax.t

Run the test with:

PERL5LIB=lib trove-cli --f=/tmp/Acme-perl5/.run-tests.conf.yml --p=yq -l -c

Command output messages:

01. Testing /tmp/Acme-perl5/t/acme.t                       [ 50% covered ]
02. Testing /tmp/Acme-perl5/t/release-pod-syntax.t         [ SKIP ]
Skip send report to coveralls.io: CI/CD identifier is missed

Log file content:

----------- STAGE no.1 -----------
ok 1
ok 2
ok 3
1..3

----------- STAGE no.2 -----------
1..0 # SKIP these tests are for release candidate testing

Try these updates with my forked repo: https://gitlab.com/pheix-research/perl-acme/.

Integration with CI/CD environments

Github

Consider module Acme::Insult::Lala, to integrate Trove to Github actions CI/CD environment we have to create .github/workflows/pheix-test-suite.yml with the next instructions:

name: CI

on:
  push:
    branches: [ master ]
  pull_request:
    branches: [ master ]

jobs:
  build:
    runs-on: ubuntu-latest

    container:
      image: rakudo-star:latest

    steps:
      - uses: actions/checkout@v2
      - name: Perform test with Pheix test suite
        run: |
          wget -qO /usr/local/bin/yq https://github.com/mikefarah/yq/releases/latest/download/yq_linux_amd64 && chmod a+x /usr/local/bin/yq
          zef install Trove
          ln -s `pwd` /tmp/Acme-Insult-Lala
          cd /tmp/Acme-Insult-Lala && RAKULIB=lib trove-cli --f=/tmp/Acme-Insult-Lala/.run-tests.conf.yml --p=yq -l -c
          cat `ls | grep "testreport"`

CI/CD magic happens at run instruction, let’s explain it line by line:

  • wget ... – manual yq binary installation;
  • zef install Trove – install Trove test tool;
  • ln -s ... – creating the module path consistent with .run-tests.conf.yml;
  • cd /tmp/Acme-Insult-Lala && ... – run the tests;
  • cat ... – print test log.

Check the job: https://github.com/pheix/Acme-Insult-Lala/actions/runs/3621090976/jobs/6104091041

Gitlab

Let’s integrate module perl5 module Acme with Trove to Gitlab CI/CD environment – we have to create .gitlab-ci.yml with the next instructions:

image: rakudo-star:latest

before_script:
  - apt update && apt -y install libspiffy-perl
  - wget -qO /usr/local/bin/yq https://github.com/mikefarah/yq/releases/latest/download/yq_linux_amd64 && chmod a+x /usr/local/bin/yq
  - zef install Trove
  - ln -s `pwd` /tmp/Acme-perl5
test:
  script:
    - cd /tmp/Acme-perl5 && PERL5LIB=lib trove-cli --f=/tmp/Acme-perl5/.run-tests.conf.yml --p=yq -l -c:
    - cat `ls | grep "testreport"`:
  only:
    - main

On Gitlab CI/CD magic happens in before_script and test/script instructions. Behavior is exactly the same as it was in run instruction for Github action.

Check the job: https://gitlab.com/pheix-research/perl-acme/-/jobs/3424335705

Perspectives: integrate subtest results to coverage

How it works now

As described above we do not cover lines of source files. We assume that unit test covers all target functionality – if unit test run is successful, we mark it 100% covered, otherwise – failed: 0%. Roughly speaking, in perspective of Coveralls source coverage – each source file to be covered is minimized to huge one-liner:

{
  "name": "module.rakumod",
  "source_digest": "8d266061dcae5751eda97450679d6c69ce3dd5aa0a2936e954af552670853aa9",
  "coverage": [ 1 ]
}

Subtests

Mostly unit tests have subtests inside. The perspective is to use subtest results as additional coverage “lines”. Consider a unit test with a few subtests under the hood:

use v6.d;
use Test;

plan 3;

subtest {ok(1,'true');}, 'subtest no.1';
subtest {ok(2,'true');}, 'subtest no.2';
subtest {ok(3,'true');}, 'subtest no.3';

done-testing;

Coveralls coverage will be:

{
  "name": "trivial.t",
  "source_digest": "d77f2fa9b43f7229baa326cc6fa99ed0ef6e1ddd56410d1539b6ade5d41cb09f",
  "coverage": [1, 1, 1]
}

And if one of the sub tests will fail, we will get 66% coverage in summary, instead of 0% for now.

Afterword

Bash vs Raku

Actually the Trove‘s avatar – Pheix test tool run-tests.bash bash script is still available and could be used with exactly the same functionality as Trove has. Obviously run-tests.bash has a few bash related advantages:

  • cross platform: bash is everywhere in Linux world;
  • maintenance: bash is universal and scripts in bash are considering as logical platform for automation and testing, I can imagine – from perspective of Python developer, it’s okay to use bash-written test tool, but it’s suspicious to use the same system in Raku, cause of language specifics.

run-tests.bash works with external processors for configuration file parsing — JSON processor jq (widely presented in different Linux distros) and YAML processor yq (probably a hacker/geek’s tool).

I have a project in C and use run-tests.bash as a default test tool. This project is hosted by GitLab and has trivial CI/CD configuration:

test-io-database:
  coverage: '/(\d+)% covered/'
  before_script:
    ...
    - wget -qO /usr/local/bin/yq https://github.com/mikefarah/yq/releases/latest/download/yq_linux_amd64 && chmod a+x /usr/local/bin/yq
    - git clone https://gitlab.com/pheix-pool/core-perl6.git /pheix
    - ln -sf /pheix/run-tests.bash run-tests.bash
  script:
    ...
    - bash run-tests.bash -f .run-tests.conf.yml -p yq -l -c
  after_script:
    - cat `ls | grep "testreport"`
  artifacts:
    paths:
      - $CI_PROJECT_DIR/testreport.*
    when: always
    expire_in: 1 year
  only:
    - master
    - devel
    - merge_requests

I skipped project specific actions by ..., but you can check full .gitlab-ci.yml here. The pipeline’s output is:

...
$ bash run-tests.bash -f .run-tests.conf.yml -p yq -l -c
Colors in output are switch on!
Config processor yq is used
Skip delete of ./lib/.precomp folder: not existed
01. Running ./debug/test-tags                            [ 25% covered ]
02. Running ./debug/test-statuses                        [ 50% covered ]
03. Running ./debug/test-events                          [ 75% covered ]
04. Running ./debug/test-bldtab                          [ 100% covered ]
Skip send report to coveralls.io: repository token is missed
...

Job output is logged to testreport.2022-12-07_16-36-16.log file and it’s available in job’s artifacts. Coverage was collected and used on project’s badge:

Performance

The last thing I would like to mention is the performance. Actually Trove is ~5% faster than the bash avatar on Pheix test suite and almost equal to prove6:

rm -rf .precomp lib/.precomp/ && time bash -c "bash run-tests.bash -c"
...

# real	1m15.644s
# user	1m44.014s
# sys	0m7.885s

rm -rf .precomp lib/.precomp/ && time trove-cli -c --f=`pwd`/run-tests.conf.yml --p=yq
...

# real	1m11.679s
# user	1m39.849s
# sys	0m8.060s

rm -rf .precomp lib/.precomp/ && time prove6 t
...

# real	1m10.110s
# user	1m38.654s
# sys	0m7.643s

And finally I was very surprised with Perl prove utility — an old, true 🇨🇭 chainsaw:

rm -rf .precomp lib/.precomp/ && time prove -e 'raku -Ilib'
...

# real	0m57.986s
# user	1m19.779s
# sys	0m6.465s

That’s all!

Christmas eve is a nice time to use Trove or its avatar in bash — enjoy them!

🎅

Day 13: Virtual Environments in Raku

Envious? If not, run zef install Envy and let’s start exploring virtual comp unit repositories.

Hold the phone! What are we doing? We’re going to explore using a module allowing us to have virtual module environments in our very favorite raku.

Why do we want this? Many reasons but a few would include:

  • development & testing environments
  • isolating module repositories by project/environment/something else
  • using multiple versions of raku more safely

Sold? Continue on!

Getting Started

Installing the environment manager is easy enough with zef install Envy. Now for this tutorial we’re going to build an interprocess worker pool that doesn’t do anything but instead of installing everything globally, we’ll get it done with a custom module repository.

In parent.raku dump the following:

use Event::Emitter::Inter-Process;

my $event = Event::Emitter::Inter-Process.new;

my Proc::Async $child .= new(:w, 'raku', '-Ilib', 'child.raku');

$event.hook($child);

$event.on('echo', -> $data {
  # got $data from child;
  say $data.decode;
});

$child.start;
sleep 1;


$event.emit('echo'.encode, 'hello'.encode);
$event.emit('echo'.encode, 'world'.encode);

sleep 5;

And then in child.raku:

use Event::Emitter::Inter-Process;

my $event = Event::Emitter::Inter-Process.new(:sub-process);

$event.on('echo', -> $data {
  "child echo: {$data.decode}".say;
  $event.emit('echo'.encode, $data);
});

sleep 3;

Okay, it’s just the sample code but the program is not the focus. On to installing Event::Emitter::Inter-Process to a virtual repo.

We need to create an environment and enable it before we can install our dependencies to it:

$ envy init tutorial
==> created tutorial
    to install to this repo with zef use:
      zef install --to='Envy#tutorial' <your modules>

$ envy enable tutorial
==> Enabled repositories: tutorial

$ zef install --to='Envy#tutorial' 'Event::Emitter::Inter-Process'
===> Searching for: Event::Emitter::Inter-Process
===> Searching for missing dependencies: Event::Emitter
===> Testing: Event::Emitter:ver<1.0.3>:auth<zef:tony-o>
===> Testing [OK] for Event::Emitter:ver<1.0.3>:auth<zef:tony-o>
===> Testing: Event::Emitter::Inter-Process:ver<1.0.1>:auth<zef:tony-o>
===> Testing [OK] for Event::Emitter::Inter-Process:ver<1.0.1>:auth<zef:tony-o>
===> Installing: Event::Emitter:ver<1.0.3>:auth<zef:tony-o>
===> Installing: Event::Emitter::Inter-Process:ver<1.0.1>:auth<zef:tony-o>

Now you should be able to just run your app:

$ raku parent.raku
child echo: hello
child echo: world
hello

And then if you disable the environment:

$ envy disable tutorial
==> Disabled repositories: tutorial
$ raku parent.raku
===SORRY!=== Error while compiling /private/tmp/parent.raku
Could not find Event::Emitter::Inter-Process in:
Envy<3697577031872>

at /private/tmp/parent.raku:1

Other Notes About Envy

Envy is in beta, there’s likely some things that don’t work quite right. PRs are most welcome and bugs are appropriately welcome. Both can be submitted here.

This article originally posted here

Day 12: RedFactory

Since the elves started using Red (https://raku-advent.blog/2019/12/21/searching-for-a-red-gift/) they thought it was missing a better way of testing code that uses it. They tested it using several SQL files that would be used before each test to populate the database with test data. That works ok, but that’s too hard to understand what’s expected from the test not looking at those SQL files. It also added a big chunk of boilerplate at the beginning of each test file for runnig the SQL. In every file it’s the same code, changing only what file to use. So they decided to look for some better way of doing that.

Searching for it they found a new module called RedFactory. It’s specific for Red and uses factories to make it easier to write and read tests written for code that uses Red. The idea about factories is to have a easy way of adding data to your test DB with default values making that easy to populate the test DB at the same file as the test and setting speccific values only for what is needed on the test.

The first thing to be done to use factories is to create the factories themselves. so, for testing the code created here first we would need to create a factory like this one:

use Child;
use Gift;
factory "child", :model(Child), {
.name = "Aline";
.country = "Brazil";
}
factory "gift", :model(Gift), {
.name = "a gift";
}

That creates 2 factories, one for Child model and another one for Gift model called child and gift respectively. A factory doesn’t need to have the same name as its model, but the first factory for a model usualy does. Other factories for that model usualy get more specific names and has more specialised data;

child factory sets default values for 2 columns (name and country) while gift sets only one (name). So lets see how to use that.

RedFactory‘s factories will use any Red‘s DB connection you set, so, if you do:

use Factories; # your factories module
my $*RED-DB = database "Pg", :host<some_host>;
my $child = factory-create "child";
view raw test.raku hosted with ❤ by GitHub

That will create a new Child entry on your Pg database. That row will contain:

idnamecountry
??AlineBrazil
(id will be the next value in the sequence)

And $child will have the object created by Red.

But you usualy don’t want to mess with your DB while testing. For helping with that, RedFactory has a helper for running that on a thrown-away DB. So, you could do that instead:

use Factories; # your factories module
my $*RED-DB = factory-db;
my $child = factory-create "child";
view raw test.raku hosted with ❤ by GitHub

That will work exactly as the other snippet, but using a SQLite database in memory. Another way of doing that is using factory-run that will receive a block that will use the in memoty SQLite DB and will receive the RedFactory object, where you can call its methods instead of using the factories functions, for example:

use Factories; # your factories module
factory-run {
my $child = .create: "child";
}
view raw test.raku hosted with ❤ by GitHub

And it will do exactly the same as the previous snippet.

Ok, that’s cool. But what about testing? Let’s do that! The elves’ code has a function to return the the number of children from a specific country (&children-on-country), so they started writing the test like this:

use Test;
use Factories; # your factories module
use Child::Helper; # imports &children-on-country
factory-run {
is children-on-country("UK"), 0;
.create: "child", :country<UK>;
is children-on-country("UK"), 1;
.create: 9, "child", :country<UK>;
is children-on-country("UK"), 10;
}
view raw test.raku hosted with ❤ by GitHub

This is using .create on child factory passing a country value to be used different from default. it also uses .createpassing an UInt as first param, that indicates .create to create as many rows as the number passed, and returns a list of those created objects.

But there is a “problem” with that. All created children will have the same name. We can do a small change on that factory to prevent that.

my @children-names = <Fernanda Sophia Eduardo Rafael Maria Lulu>;
my @countries = <Brazil England Scotland>;
factory "child", :model(Child), {
.name = { "{ @children-names.pick } { .counter-by-model }" };
.country = { @countries.pick };
}
view raw test.raku hosted with ❤ by GitHub

You can pass a block to to have it generate dynamic data for the column. That block will receive a Factory objects that over other things has a method that will return an incremented UInt every time it’s called (by model) (.counter-by-model).country is also changed, now it will return a random country for each raw created.

So, that made the elves’ tests much simpler to grok.

For more information about RedFactory, please look at https://github.com/FCO/RedFactory.

Day 11: Santa CL::AWS

Santa’s elves are in charge of updating the e-Christmas site every year and, since that site uses WordPress, it needs a full rebuild each time to make sure that it is ready for all the kids to Post their Christmas lists without drooping under the weight of traffic.

This winter, they thought it would be cool to move their WordPress site to the CLoud by using Amazon Web Services to keep their gift wrapping area free of servers and router racks.

They looked for a tool that would help them to manage all the phases of launching a clean WordPress build:

  1. Launch a clean AWS EC2 server with Ubuntu 22.04LTS, set up security groups and elastic IP (via the awscli) and ssh into the new instance
  2. Use apt-get (on the EC2 instance Ubuntu cli) to install the minimum set of packages to run docker-compose
  3. Use git clone to get the platform docker-compose.yaml and so run clean instances of MySQL, WordPress and NGINX with ports and SSL certificates
  4. Install a predefined set of WordPress Themes and Plugins into the instances (via the WordPress cli) and populate pages and content by moving in content files

It would be some work to set all this up, but a layered approach (ssh’ing into the AWS base instance and then into the child Docker VMs) would mean that the “pattern” of the WordPress site could be standardized and repeatable. And that the layers could be extended to other cloud providers, other web applications and so on. The configuration could be stored in a layered set of .yaml files.

Authors note: I am still working on step 1 … so this is the subject matter for this post. Keep an eye on my blog for future posts about the other steps over at https://p6steve.com

Before starting Santa asked his reindeer what would be the best language for this.

Doner said “I would use Bash but that’s pretty clunky, probably need to add some awk so I can regex stuff our of the JSON results, and it lacks any sensible class / object way to model stuff, plus I would have to learn it, hmmm”

Blitzen said “perl5 – that’s everywhere and it’s fast and it has some useful CPAN modules such as AWS CLI and PAWS (oh look, there’s a WordPress CLI … would need to write a module for that) but sadly it’s missing the -Ofun and maintainability for me these days”

Rudolph said “python – well I have done some coding in python and it’s great for simple OO and has a mountain of modules and packages – but really python is a square peg to the round hole of installation and CLI scripts”

The discussion was settled by Mrs CL::AWS “we need a kitchen sink language (geddit?!) where CLI and OO and Modules are all first class citizens – why don’t we try raku?”

Here’s a snippet from version one…

use Paws:from<Perl5>;
use Paws::Credential::File:from<Perl5>;

# will open $HOME/.aws/credentials
my $paws = Paws.new(config => {
  credentials => Paws::Credential::File.new(
    file_name => 'credentials',
  ),  
  region => 'eu-west-2',
  output => 'json',
});

my $ec2 = $paws.service('EC2');

my $result = $ec2.DescribeAddresses.Addresses;
dd $result;

Look we can use awscli directly via the awesome CPAN perl5 Paws module, no need for a gift wrapper or anything.

Authors note: I link a recent discussion on Reddit where I was finally convinced that perl5 modules require no wrapper … on that point, as you can see from the snippet, raiph is right. All the same, I personally have two unrelated issues with this approach: (i) Paws is huge and quite intimidating to swallow all at once, I want to apply just the minimum set of things and (ii) this requires my director machine to have awscli and Python (awscli is written in Python!) and perl5 and cpanm and Paws installed along with raku which is quite a bunch of stuff that I really don’t want on my main dev machine with penv and all that jazz.

Hmmm – a late night on the Advocaat convinces Mrs CL::AWS to try again, but to cut things down to size all is really needed is ‘apt-get install awscli && aws configure’ and then to take the same approach as perl5 does via shell commands and backticks.

Let’s see, do I need something like this from the raku docs:

my $proc = run 'echo', 'Rudolph is Great!', :out;
$proc.out.slurp(:close).say; # OUTPUT: «Rudolph is Great!␤» 

That seems a bit less handy than perl5 backticks, surely I can do better:

my $word = "kids";
say qqx`echo "hello $word"`;  # OUTPUT: «hello kids␤»

Authors note: qqx is perfect since the double quote nature automatically interpolates variable names like ‘$word’ and it returns stdout which we need for the awscli response. One really cool things is that the delimiters , often ‘qqx{…}’ may be any character, so I use backticks for old timers` sake and to keep out of the way of {} for function calls.

So here’s some version 2.0:

use JSON::Fast;

my $image-id = 'ami-0f540e9f488cfa27d';
my $instance-type = 't2.micro';

qqx`aws ec2 run-instances --image-id $image-id --count 1 --instance-type $instance-type --key-name $key-name --security-group-ids $sg-id` andthen 

say my $instance-id = .&from-json<Instances>[0]<InstanceId>;

Some other little gifts from Raku are:

  • qqx sets the topic to the cli response,
  • andthen hands the topic from left to right
  • I can then use . to apply any method to the topic
  • the & converts the sub from-json to a method call
  • the <> autoquote to streamline the accessors into the json result

And here’s a snapshot of the whole thing (for step 1) in a gist:

As a way to channel perl5 backticks ad apply some cli magic, this gist shows how raku builds so nicely on the perl5 cli heritage and avoids burying the awscli commands in distracting boilerplate so that the intent is clear to coders / maintainers. But, this is a linear piece that is getting to the limit of procedural steps and is pretty hard to repurpose and/or extend.

We’re running out of time & space as I have to put the kettle on for Santa and the Elves. Maybe I can come back later and show how raku OO can be used to tease out the innate structure and relationships to give a deeper model which can be reasoned about.

Merry Christmas to .one and .all!

~p6steve

Day 10: SparrowCI pipelines cascades of fun

Remember the young guy in the previous SparrowCI story? We have not finished with him yet …

Because New Year time is coming and brings us a lot of fun, or we can say cascades of fun …

So, our awesome SparrowCI pipelines plumber guy is busy with sending the gift to his nephew:

sparrow.yaml:

tasks:
  -
    name: zef-build
    language: Bash
    default: true
    code: |
      set -e
      cd source/
      zef install --deps-only --/test .
      zef test .

Once a gift is packed and ready, there is one little thing that is left.

– And that is – to send the gift to Santa, to His wonderful (LAP|Raku)land

So, SparrowCI guy gets quickly to it, and he knows what to do (did not I tell you , he is very knowledgeable? :-), creating a small, nifty script to publish things to Santa’s land:

.sparrow/publish.yaml

image:
  - melezhik/sparrow:debian

secrets:
  - FEZ_TOKEN
tasks:
  - name: fez-upload
    default: true
    language: Raku
    init: |
      if config()<tasks><git-commit><state><comment> ~~ /'Happy New Year'/ {
        run_task "upload"
      }
    subtasks:
    -
      name: upload
      language: Bash
      code: |
        set -e
        cat << HERE > ~/.fez-config.json
          {"groups":[],"un":"melezhik","key":"$FEZ_TOKEN"}
        HERE
        cd source/
        zef install --/test fez
        head Changes
        tom --clean
        fez upload
    depends:
      -
        name: git-commit
  - name: git-commit
    plugin: git-commit-data
    config:
      dir: source

Didn’t you notice, SparrowCI lad needs to tell Santa’s his (-fez-token-) secret to do so, but don’t worry! – Santa knows how to keep secrets!

secret

Finally, SparrowCI plumber ties “package” and “publish” things together and we have CASCADING PIPELINES of FUN

sparrow.yaml:

# ...
followup_job: .sparrow/publish.yaml

And, here we are, ready to share some gifts:

git commit -m "Happy New Year" -a
git push

Remember, what should we say to Santa, once we see him? Yes – Happy New Year!

This “magic” commit phrase will open door in Santa’s shop and deliver the package straight to it!

publish

That is it?

Yes and … no – you can read all that technical stuff in more boring, none holiday manner on SparrowCI site, but don’t forget – SparrowCI is FUN.

Day 9: Something old, something borrowed, something new, something stashed

Santa, having a little time off earlier this year, was looking at all of the modules that the Raku elves had made over the years, now over 2000 of them! But then he noticed something: not all of the modules appear to come from the same ecosystem? So what’s going on here, he asked one of the Raku core elves, Lizzybel. “It’s complicated”, she said. And continued:

Something old

You see, a long time ago, when Raku was but an alpha-version programming language, some of the Raku elves started writing some useful modules. But it was problematic to distribute and install them. You would need to know the exact URL of the source of the module to be able to download, and install it.

So some smart elf realized that if there would be a single list of those URLs on the interwebs, it would be possible to read that regularly, see if there are any new or changed entries, and create a small database (well, actually a JSON file) from introspecting all of the information in those modules. With that database, you could ask for a module name, and it would give you the URL where the code was actually located. Writing a script that would download and install a module given a module name, was relatively easy after that.

The main problem with this approach, is that if an elf would update a module without updating the version information, people could get different versions of a module, even though they had the same version number. And from a security point of view, nobody was checking whether the uploader actually matched the “owner” of the module. And although no impersonations are known to have happened, it is definitely not something the Raku elves want to continue to support in the long run.

“So, does this is the original Raku ecosystem?”, Santa asked. “Yes, indeed”, Lizzybel said, “and us Raku core elves sometimes refer to this as the ‘p6c’ ecosystem, for various hysterical raisins”.

“Very drole”, Santa mumbled.

Something borrowed

“But what about that CPAN ecosystem I saw on raku.land?”, said Santa. “Ah that, eh”, said Lizzybel. And continued again:

When it became clear that the first official release of Raku was going to happen, I asked at a Toolchain Summit with the Perl elves, whether we should try to get a shared module ecosystem or not. The majority of the elves thought it would be a good idea to pool resources in that respect. And so Perl and Raku elves worked a lot on making the underlying storage system of the Perl ecosystem (aka CPAN) handle Raku modules as well. Now you only needed to get a PAUSE login (the upload system of CPAN), and mark your module as being a Raku module, and you would be set!

The CPAN system had the advantage that we would at least be sure who had uploaded a module. But it doesn’t check whether it matches the internal information of the module. So it still has the potential for abuse.

“Yeah, that’s still not ideal”, said Santa.

Something new

“Indeed not”, said Lizzybel. And once more continued:

So some other smart elves decided it was time to get a proper Raku solution for the ecosystem. A place where not only we would know who had uploaded a module, but also a place where the internal information of a module was checked to see if it matched with the uploader. They were basically the same elves that had made the new module installer “zef”, and they thought it would be appropriate to call the new module upload logic “fez” (“zef” for download, “fez” for upload).

This ecosystem has all of the features we want for the future of Raku. Too bad the majority of the modules is still in the other ecosystems.

“So, the Raku elves should be moving to the “zef” ecosystem?”, wondered Santa. “Yeah, that would be best”, said Lizzybel, hoping that Santa wouldn’t know about the sunsetting announcement. “Ah, now I remember something about these older ecosystems, weren’t they supposed to be phased out earlier this year?”, said Santa without raising his voice much. Lizzybel blushed, and said: “Yeah, it was supposed to. But so much has happened in 2022, it was hard to not be distracted”. Santa nodded and said “Indeed it was, and it still is” with a look of understanding and sadness.

Something stashed

Then Santa showed that there was a bit of a devious streak in him: “hmmm… so what would happen if a naughty elf would remove a module from the ecosystem? Wouldn’t that potentially cause problems for other elves using that module in production?”. Lizzybel glowed a bit: “Yes, it would. Because of that, I implemented the Raku Ecosystem Archive. It contains all versions of all Raku modules that ever existed. Well, that were still available when I started the Raku Ecosystem Archive harvester, about a year ago. And the Raku elves who did “zef” made it fallback to that, so that you should be able to install any module forever”. “Aha”, said Santa, “so do elves that upload modules need to do anything special to have their module archived?”. “Nope”, said Lizzybel. “Nice”, said Santa.

Then Santa was distracted by the snow outside and mumbled: “Better get the reindeer prepared”.

Day 8: I’ll Let You Know Later

Back when the web was young the only way that you could know whether a resource had changed its state was to manually re-request the page, this wasn’t really too much of a problem when there was only static pages which didn’t change all that often. Then along came server-side applications, the CGI and the like, these could change their state more frequently in ways that you might be interested in, but in effect you were still stuck with some variation of refreshing the page (albeit possibly initiated by the browser under the instruction of some tag in the page), so if, say, you had an application that kicked off a long running background task it might redirect you to another page that checked the status of the job that would periodically refresh itself then redirect to the results when the task was complete, (in fact I know of at least one reasonably well known reporting application that does just this still in 2022.)

Then sometime around the turn of century things started to get a lot more interactive with the introduction of the XMLHttpRequest API which allowed a script in a web page to make requests to the server and, based on the response, update the view appropriately, thus making it possible for a web page to reflect a change in state in the server without any refreshing ( though still with some polling of the server in the background by the client-side script.) Then along came the WebSocket API which provides for bi-directional communication between the client and server, and Server-Sent Events which provides for server push of events (with associated data.) These technologies provide means to reflect changes in an application state in a web page without needing a page refresh.

Here I’m going to describe a way of implementing client side notifications from a Raku web application using Server-sent Events.

Server-sent Events

The Server-sent Events provide a server to client push mechanism implemented using a persistent but otherwise standard HTTP connection with Chunked transfer encoding and typically a Content-Type of text/event-stream. The client-side API is EventSource and is supported by most modern browsers, there are also client libraries ( including EventSource::Client,) allowing non-web applications to consume an event stream (but that will be for another time.)

On the server side I have implemented the EventSource::Server; while the examples here are using Cro it could be used with any HTTP server framework that will accept a Supply as the response data and emit chunked data to the client until Supply is done.

Conceptually the EventSource::Server is very simple: it takes a Supply of events and transforms them into properly formatted EventSource events which can be transmitted to the client in a stream of chunked data.

The Client side part

This is the index.html that will be served as static content from our server, it’s about the simplest I could come up with (using jQuery and Bootstrap for simplicity.) Essentially it’s a button that will make a request to the server, a space to put our “notifications” and the Javascript to consume the events from the server and display the notifications.

I don’t consider client side stuff as one of my core competencies, so forgive me for this.

<!DOCTYPE html>
<html lang="en">
 <head>
  <meta charset="utf-8">
  <meta name="viewport" content="width=device-width, initial-scale=1">
  <title>Bootstrap 101 Template</title>
  <link rel="stylesheet" href="https://cdn.jsdelivr.net/npm/bootstrap@3.3.7/dist/css/bootstrap.min.css">
  <link rel="stylesheet" href="https://cdn.jsdelivr.net/npm/bootstrap@3.3.7/dist/css/bootstrap-theme.min.css">
 </head>
 <body>
  <main role="main" class="container-fluid">
   <div class="row">
    <div class="col"></div>
    <div class="col-8 text-center">
     <a href="button-pressed" class="btn btn-danger btn-lg active" role="button" aria-pressed="true">Press Me!</a>
    </div>
    <div class="col" id="notification-holder"></div>
   </div>
  </main>
  <script src="https://ajax.googleapis.com/ajax/libs/jquery/3.2.1/jquery.min.js"></script>
  <script src="https://cdn.jsdelivr.net/npm/bootstrap@3.3.7/dist/js/bootstrap.min.js"></script>
  <script>
    var sse;
    function createNotification(message, type) {
      var html = '<div class="shadow bg-body rounded alert alert-' + type + ' alert-dismissable page-alert">';
      html += '<button type="button" data-dismiss="alert" class="close"><span aria-hidden="true">×</span><span class="sr-only">Close</span></button>';
      html += message;
      html += '</div>';
      $(html).hide().prependTo('#notification-holder').slideDown();
    };
    function notificationHandler(e) {
      const message = JSON.parse(event.data);
      createNotification(message.message, message.type);
    };
    function setupNotifications() {
      if ( sse ) {
        sse.removeEventListener("notification", notificationHandler);
        sse.close;
      }
 	 
      sse = new EventSource('/notifications');
      sse.addEventListener("notification", notificationHandler );
      $('.page-alert .close').click(function(e) {
        e.preventDefault();
        $(this).closest('.page-alert').slideUp();
      });
      return sse
    };
    setupNotifications();
  </script>
 </body>
</html>

Essentially the Javascript sets up the EventSource client to consume the events we will publish on /notifications and adds a Listener which parses the JSON data in the event (it doesn’t have to be JSON, but I find this most convenient,) and then insert the “notification” in the DOM. The rest is mostly Bootstrap stuff for dismissing the notification.

You could of course implement this in any other client-side framework (Angular, React or whatever the new New Hotness is,) but we’re here for the Raku not the Javascript.

Anyway this isn’t going to change at all, so if you actually want to run the examples, you can save it and forget about it.

The Server Side

The server part of our application is, largely, a simple Cro::HTTP application with three routes : one to serve up our index.html from above, another to handle the button push request and obviously a route to serve up the event stream on /notifications.

This is all bundled up in a single script for convenience of exposition, in a real world application you’d almost certainly want to split it up into several files.

class NotificationTest {
    use Cro::HTTP::Server;
    has Cro::Service $.http;

    class Notifier {
        use EventSource::Server;
        use JSON::Class;

        has Supplier::Preserving $!supplier = Supplier::Preserving.new;

        enum AlertType is export (
          Info    => "info",
          Success => "success",
          Warning => "warning",
          Danger  => "danger"
        );

        class Message does JSON::Class {
            has AlertType $.type is required is marshalled-by('Str');
            has Str $.message is required;
            has Str $.event-type = 'notification';
        }

        method notify(
          AlertType  $type,
              Str()  $message,
              Str  :$event-type = 'notification'
        --> Nil ) {
            $!supplier.emit:
              Message.new(:$type, :$message :$event-type );
        }

        multi method event-stream( --> Supply) {
            my $supply = $!supplier.Supply.map: -> $m {
                EventSource::Server::Event.new(
                  type => $m.event-type,
                  data => $m.to-json(:!pretty)
                )
            }
            EventSource::Server.new(
              :$supply,
              :keepalive,
              keepalive-interval => 10
            ).out-supply;
        }
    }

    class Routes {
        use Cro::HTTP::Router;

        has Notifier $.notifier
          handles <notify event-stream> = Notifier.new;

        method routes() {
            route {
                get -> {
                    static $*PROGRAM.parent, 'index.html';
                }
                get -> 'notifications' {
                    header 'X-Accel-Buffering', 'no';
                    content 'text/event-stream', $.event-stream();
                }
                get -> 'button-pressed' {
                    $.notify(Notifier::Info, 'Someone pressed the button');
                }
            }
        }
    }

    has $.routes-object;

    method routes-object( --> Routes ) handles <routes> {
        $!routes-object //= Routes.new();
    }

    method http( --> Cro::Service ) handles <start stop> {
        $!http //= Cro::HTTP::Server.new(
          http => <1.1>,
          host => '0.0.0.0',
          port => 9999,
          application => $.routes,
        );
    }
}

multi sub MAIN() {
    my NotificationTest $http = NotificationTest.new;
    $http.start;
    say "Listening at https://127.0.0.1:9999";
    react {
        whenever signal(SIGINT) {
            $http.stop;
            done;
        }
    }
} 

There’s nothing particularly unusual about this, but you’ll probably see that nearly everything is happening in the Notifier class. The routes are defined within a method within a Routes class so that the key methods of Notifier can be delegated from an instance of that class, which makes it nicer than having a global object, but also makes it easier to refactor or even replace the Notifier at run time (perhaps to localise the messages for example.)

The Notifier class itself can be thought of as a wrapper for the EventSource::Server, there is a Supplier (here a Supplier::Preserving which works better for this scenario,) onto which objects of Message or emitted by notify method, the Message class consumes JSON::Class so that it can easily be serialized as JSON when creating the final event that will be output onto the event stream. The EventType enumeration here maps to the CSS classes in the resulting notification HTML that influence the colour of the notification as displayed.

Most of the action here is actually going on in the event-stream method, which constructs the stream that is output to the client:

multi method event-stream( –> Supply) {
    my $supply = $!supplier.Supply.map: -> $m {
        EventSource::Server::Event.new(
          type => $m.event-type,
          data => $m.to-json(:!pretty)
        )
    }
    EventSource::Server.new(
      :$supply,
      :keepalive,
      keepalive-interval => 10
    ).out-supply;
} 

This maps the Supply derived from our Supplier such that the Message objects are serialized and wrapped in an EventSource::Server::Event object, the resulting new Supply is then passed to the EventSource::Server. The out-supply returns a further Supply which emits the encode event stream data suitable for being passed as content in the Cro route. The wrapping of the Message in the Event isn’t strictly necessary here as EventSource::Server will do it internally if necessary, but doing so allows control of the type which is the event type that will be specified when adding the event listener in your Javascript, so, for instance, you could emit events of different types on your stream and have different listeners for each in your Javascript, each having a different effect on your page.

The route for /notifications probably warrants closer inspection:

get -> 'notifications' {
    header 'X-Accel-Buffering', 'no';
    content 'text/event-stream', $.event-stream();
} 

Firstly, unless you have a particular reason, the Content Type should always be text/event-stream otherwise the client won’t recognise the stream, and, in all the implementations I have tried at least, will just sit there annoyingly doing nothing. The header here isn’t strictly necessary for this example, however if your clients will be accessing your application via a reverse proxy such as nginx then you may need to supply this (or one specific to your proxy,) in order to prevent the proxy buffering your stream which may lead to the events never being delivered to the client.

But what if don’t want everyone to get the same notifications?

This is all very well but for the majority of applications you probably want to send notifications to specific users (or sessions,) it’s unlikely that all the users of our application are interested that someone pressed the button, so we’ll introduce the notion of a session using Cro:HTTP::Session::InMemory, this has the advantage of being very simple to implement (and built-in.)

The changes to our original example are really quite small (I’ve omitted any authentication to keep it simple:)

class NotificationTest {
    use Cro::HTTP::Server;
    use Cro::HTTP::Auth;

    has Cro::Service $.http;

    class Session does Cro::HTTP::Auth {
        has Supplier $!supplier handles <emit Supply> = Supplier.new;
    }

    class Notifier {
        use EventSource::Server;
        use JSON::Class;

        enum AlertType is export (
          Info    => "info",
          Success => "success",
          Warning => "warning",
          Danger  => "danger"
        );

        class Message does JSON::Class {
            has AlertType $.type is required is marshalled-by('Str');
            has Str $.message is required;
            has Str $.event-type = ‘notification‘;
        }

        method notify(
          Session   $session,
          AlertType $type,
              Str() $message,
              Str  :$event-type = 'notification'
        –> Nil) {
            $session.emit: Message.new(:$type, :$message :$event-type );
        }

        multi method event-stream(Session $session, –> Supply) {
            my $supply = $session.Supply.map: -> $m {
                EventSource::Server::Event.new(
                  type => $m.event-type,
                  data => $m.to-json(:!pretty)
                )
            }
            EventSource::Server.new(
              :$supply,
              :keepalive,
              keepalive-interval => 10
            ).out-supply;
        }
    }

    class Routes {
        use Cro::HTTP::Router;
        use Cro::HTTP::Session::InMemory;

        has Notifier $.notifier handles <notify event-stream> = Notifier.new;

        method routes() {
            route {
                before Cro::HTTP::Session::InMemory[Session].new;
                get -> Session $session {
                    static $*PROGRAM.parent, ‘index.html‘;
                }
                get -> Session $session, ‘notifications‘ {
                    header ‘X-Accel-Buffering‘, ‘no‘;
                    content ‘text/event-stream‘, $.event-stream($session);
                }
                get -> Session $session, ‘button-pressed‘ {
                    $.notify($session, Notifier::Info, ‘You pressed the button‘);
                }
            }
        }
    }

    has $.routes-object;

    method routes-object( –> Routes ) handles <routes> {
        $!routes-object //= Routes.new();
    }

    method http( –> Cro::Service ) handles <start stop> {
        $!http //= Cro::HTTP::Server.new(
          http => <1.1>,
          host => ‘0.0.0.0‘,
          port => 9999,
          application => $.routes,
        );
    }
}

multi sub MAIN() {
    my NotificationTest $http = NotificationTest.new;
    $http.start;
    say “Listening at https://127.0.0.1:9999“;
    react {
        whenever signal(SIGINT) {
            $http.stop;
            done;
        }
    }
} 

As you can see much of the code remains unchanged, we’ve introduced a new Session class and made some changes to the Notifier methods and the routes.

The Session class is instantiated on the start of a new session and will be kept in memory until the session expires:

class Session does Cro::HTTP::Auth {
    has Supplier $!supplier
      handles <emit Supply> = Supplier.new;
} 

Because the same object stays in memory we can replace the single Supplier of the Notifier object with a per-session one, the same Session object being passed to the routes during the lifetime of the session:

method routes() {
    route {
        before Cro::HTTP::Session::InMemory[Session].new;
        get -> Session $session {
            static $*PROGRAM.parent, 'index.html';
        }
        get -> Session $session, 'notifications' {
            header 'X-Accel-Buffering', 'no';
            content 'text/event-stream', $.event-stream($session);
        }
        get -> Session $session, 'button-pressed' {
            $.notify($session, Notifier::Info, 'You pressed the button');
        }
    }
} 

The Cro::HTTP::Session::InMemory is introduced as a Middleware that handles the creation or retrieval of a session, setting the session cookie and so forth before the request is passed to the appropriate route. Where the first argument to a route block has a type that does Cro::HTTP::Auth then the session object will be passed, you can do interesting things with authentication and authorization by using more specific subsets of your Session class but we won’t need that here and we’ll just pass the session object to the modified Notifier methods:

method notify(
    Session $session,
  AlertType $type,
      Str() $message,
       Str :$event-type = 'notification'
–> Nil) {
        $session.emit: Message.new(:$type, :$message :$event-type );
}
     
multi method event-stream( Session $session, –> Supply) {
    my $supply = $session.Supply.map: -> $m {
        EventSource::Server::Event.new(
          type => $m.event-type,
          data => $m.to-json(:!pretty)
        )
    }
    EventSource::Server.new(
      :$supply,
      :keepalive,
      keepalive-interval => 10
    ).out-supply;
} 

Both the notify and event-stream are simply amended to take the Session object as the first argument and to use the (delegated) methods on the Session’s own Supplier rather than the shared one from Notifier.

And now each ‘user’ can get their own notifications, the button could be starting a long running job and they could be notified when it’s done. You could extend to do “broadcast” notifications by putting back the shared Supplier in Notifier, make a second multi candidate of notify which doesn’t take the Session and which would emit to that Supplier, then merge the shared and instance specific Supplies in the event-stream method.

But what if I have more than instance of my application?

You’ve probably worked out by now that using the “in-memory” session won’t work if you have more than one instance of your application, you might be able to get away with setting up “sticky sessions” on a load balancer at a push, but probably not something you’d want to rely on.

What we need is a shared source of notifications to which all the new notifications can be added and from which each instance will retrieve the notifications to be sent.

For this we can use a PostgreSQL database, which handily has a NOTIFY which allows the server to send a notification to all the connected clients that have requested to receive them.

In the amended application we will use Red to access the database ( plus a feature of DB::Pg to consume notifications from the server.)

For our simple application we only a table to hold the notifications, and a table in which to persist the sessions ( using Cro::HTTP::Session::Red ,) so let’s make them upfront:

CREATE FUNCTION public.new_notification() RETURNS trigger LANGUAGE plpgsql AS $$
    BEGIN
    PERFORM pg_notify(‘notifications‘, ‘‘ || NEW.id || ‘‘);
    RETURN NEW;
    END;
    $$;
     
    CREATE TABLE public.notification (
      id uuid NOT NULL,
      session_id character varying(255),
      type character varying(255) NOT NULL,
      message character varying(255) NOT NULL,
      event_type character varying(255) NOT NULL
    );
     
    CREATE TABLE public.session (
      id character varying(255) NOT NULL
    );
     
    ALTER TABLE ONLY public.notification
    ADD CONSTRAINT notification_pkey PRIMARY KEY (id);
     
    ALTER TABLE ONLY public.session
    ADD CONSTRAINT session_pkey PRIMARY KEY (id);
     
    CREATE TRIGGER notification_trigger AFTER INSERT ON public.notification FOR EACH ROW EXECUTE PROCEDURE public.new_notification();
     
    ALTER TABLE ONLY public.notification
    ADD CONSTRAINT notification_session_id_fkey FOREIGN KEY (session_id) REFERENCES public.session(id); 

I’ve used a database called notification_test in the example. The notification table has similar columns to the attributes of the Message class with the addition of the id and session_id, there is a trigger on insert that sends the Pg notification with the id of the new row, which will be consumed by the application.

The session table only has the required id column that will be populated by the session middleware when the new session is created.

The code has a few more changes than between the first examples, but the majority of the changes are to introduce the Red models for the two DB tables and to rework the way that the Notifier works:

class NotificationTest {
    use Cro::HTTP::Server;
    use Cro::HTTP::Auth;
    use UUID;
    use Red;
    use Red::DB;
    need Red::Driver;
    use JSON::Class;
    use JSON::OptIn;
     
    has Cro::Service $.http;
     
    model Message {
        …
    }
     
    model Session is table('session') does Cro::HTTP::Auth {
        has Str $.id is id;
        has @.messages
          is relationship({ .session-id }, model => Message )
          is json-skip;
    }
     
    enum AlertType is export (
      Info    => "info",
      Success => "success",
      Warning => "warning",
      Danger  => "danger"
    );
     
    model Message is table('notification') does JSON::Class {
        has Str $.id is id is marshalled-by('Str') = UUID.new.Str;
        has Str $.session-id is referencing(model => Session, column => 'id' ) is json-skip;
        has AlertType $.type is column is required is marshalled-by('Str');
        has Str $.message is column is required is json;
        has Str $.event-type is column is json = 'notification';
    }
     
    has Red::Driver $.database = database 'Pg', dbname => 'notification_test';
     
    class Notifier {
        use EventSource::Server;

        has Red::Driver $.database;
     
        method database(–> Red::Driver) handles <dbh> {
            $!database //= get-RED-DB();
        }
     
        has Supply $.message-supply;
     
        method message-supply( –> Supply ) {
            $!message-supply //= supply {
                whenever $.dbh.listen('notifications') -> $id {
                    if Message.^rs.grep(-> $v { $v.id eq $id }).head -> $message {
                        emit $message;
                    }
                }
            }
        }
     
        method notify(
          Session   $session,
          AlertType $type,
              Str() $message,
               Str :$event-type = 'notification'
        –> Nil ) {
            Message.^create(
              session-id => $session.id, :$type, :$message :$event-type
            );
        }
     
        multi method event-stream( Session $session, –> Supply) {
            my $supply = $.message-supply.grep( -> $m {
                $m.session-id eq $session.id
            }).map( -> $m {
                EventSource::Server::Event.new(
                  type => $m.event-type,
                  data => $m.to-json(:!pretty)
                )
            });
            EventSource::Server.new(
              :$supply,
              :keepalive,
              keepalive-interval => 10
            ).out-supply;
        }
    }
         
    class Routes {
        use Cro::HTTP::Router;
        use Cro::HTTP::Session::Red;
     
        has Notifier $.notifier
          handles <notify event-stream> = Notifier.new;
     
        method routes() {
            route {
                before Cro::HTTP::Session::Red[Session].new: cookie-name => 'NTEST_SESSION';
                get -> Session $session {
                    static $*PROGRAM.parent, 'index.html';
                }
                get -> Session $session, 'notifications' {
                    header 'X-Accel-Buffering', 'no';
                    content 'text/event-stream', $.event-stream($session);
                }
                get -> Session $session, 'button-pressed' {
                    $.notify($session, Info, 'You pressed the button');
                }
            }
        }
    }
     
    has $.routes-object;
     
    method routes-object( –> Routes ) handles <routes> {
        $!routes-object //= Routes.new();
    }
     
    method http( –> Cro::Service ) handles <start stop> {
        $!http //= Cro::HTTP::Server.new(
          http => <1.1>,
          host => '0.0.0.0',
          port => 9999,
          application => $.routes,
        );
    }
}
     
multi sub MAIN() {
    my NotificationTest $http = NotificationTest.new;
    $GLOBAL::RED-DB = $http.database;
    $http.start;
    say "Listening at https://127.0.0.1:9999";
    react {
        whenever signal(SIGINT) {
            $http.stop;
            done;
        }
    }
} 

I’ll gloss over the definition of the Red models as that should be mostly obvious, except to note that the Message model also does JSON::Class which allows the instances to be serialized as JSON (just like the original example,) so no extra code is required to create the events that are sent to the client.

The major changes are to the Notifier class which introduces message-supply which creates an on-demand supply) replacing the shared Supplier of the first example, and the per-session Supplier of the second:

has Supply $.message-supply;
 	 
method message-supply( –> Supply ) {
    $!message-supply //= supply {
        whenever $.dbh.listen(‘notifications‘) -> $id {
            if Message.^rs.grep(-> $v { $v.id eq $id }).head -> $message {
                emit $message;
            }
        }
    }
} 

This taps the Supply of Pg notifications provided by the underlying DB::Pg, which ( referring back to the SQL trigger described above,) emits the id of the newly created notification rows in the database, the notification row is then retrieved and then emitted onto the message-supply.

The notify method is altered to insert the Message to the notification table:

method notify(
  Session $session,
  AlertType $type,
  Str() $message,
  Str :$event-type = 'notification'
–> Nil ) {
        Message.^create(session-id => $session.id, :$type, :$message :$event-type );
} 

The signature of the method is unchanged and the session-id from the supplied Session is inserted into the Message.

The event-stream method needs to be altered to process the Message objects from the message-supply and select only those for the requested Session:

multi method event-stream( Session $session, –> Supply) {
    my $supply = $.message-supply.grep( -> $m {
        $m.session-id eq $session.id
    }).map( -> $m {
        EventSource::Server::Event.new(
          type => $m.event-type,
          data => $m.to-json(:!pretty)
        )
    });
    EventSource::Server.new(
      :$supply,
      :keepalive,
      keepalive-interval => 10
    ).out-supply;
} 

And that’s basically it, there’s a little extra scaffolding to deal with the database but not a particulary large change.

What else?

I’ve omitted any authentication from these example for brevity, but if you wanted to have per-user notifications then, if you have authenticated users, you could add the user id to the Message and filter where the user matches that of the Session.

Instead of using the Pg notifications, if you want to still use a database, you could repeatedly query the notifications table for new notifications as a background task. Or you could use some message queue to convey the notifications (ActiveMQ topics or a RabbitMQ fanout exchange for example).

But now you can tell your users what is going on in the application without them having to do anything.

Day 7: .hyper and Cro

or How (not) to pound your production server

(and to bring on the wrath of the Ops)

So, I’m a programmer and I work for a government TI “e-gov” department. My work here is mostly comprised of one-off data-integration tasks (like the one in this chronicle) and programming satellite utilities for our Citizen Relationship Management system.

the problem

So, suppose you have:

  1. a lot (half a million) records in a .csv file, to be entered in your database;
  2. a database only accessible via a not-controlled-by-you API;
  3. said API takes a little bit more than half a second per record;
  4. some consistency checks must be done before sending the records to the API; but
  5. the API is a “black box” and it may be more strict than your basic consistency checks;
  6. tight schedule (obviously)

the solution

the prototype: Text::CSV and HTTP::UserAgent

So, taking half a second per record just in the HTTP round-trip is bad, very bad (34 hours for the processing of the whole dataset).

sub read-csv(IO() $file) {
gather {
my $f = $file.open: :r :!chomp;
with Text::CSV.new {
.header: $f, munge-column-names => { S:g /\W+//.samemark('x').lc };
while my $row = .getline-hr: $f { take $row }
}
}
}
sub csv-to-yaml(@line –> Str)
# secret sauce
my %obj = do { … };
to-yaml %obj
}
sub server-put($_) {
# HTTP::UserAgent
}
sub MAIN(Str $input) {
my @r = lazy read-csv $input;
server-login;
server-put csv-to-json $_ for @r
}

.hyperize it

Let’s try to make things move faster…

sub MAIN(Str $input) {
my @r = lazy read-csv $input;
server-login;
react {
whenever supply {
.emit for @r.hyper(:8degree, :16batch)
.map(&csv-to-yaml)
} {
server-post $_
}
}
}

So, explaining the code above a little bit: @r is a lazy sequence (this means, roughly, that the while my $row bit in read-csv is executed one row at a time, in a coroutine-like fashion.) When I use .hyper(:$degree, :$batch), it transforms the sequence in a “hyper-sequence”, basically opening a thread pool with $degree threads and sending to each thread $batch itens from the original sequence, until its end.

Yeah, but HTTP::UserAgent does not parallelise very nicely (it just does not work)… besides, why the react whenever supply emit? It’s a mystery lost to the time. Was it really needed? Probably not, but the clock is always ticking, so just move along.

Cro::HTTP to the rescue

sub server-login() {
my Lock \l .= new;
our $cro;
l.protect: {
my $c = Cro::HTTP::Client.new:
base-uri => SERVER-URL,
content-type => JSON,
user-agent => 'honking/2022.2.1',
timeout => %(
connection => 240,
headers => 480,
),
cookie-jar => Cro::HTTP::Client::CookieJar.new,
;
await $c.post: "{SERVER-URI}/{SESSION-PATH}", body => CREDENTIALS
$cro = $c
}
$cro
}
sub server-post($data) {
our $cro;
my $r = await $cro.post: "{SERVER-URI}/{DATA-PATH}", body => $data;
await $r.body
}

Nice, but I ran the thing on a testing database and… oh, no… lots of 503s and eventually a 401 and the connection was lost.

constant NUMBER-OF-RETRIES = 3; # YMMV
constant COOLING-OFF-PERIOD = 2; # this is plenty to stall this thread
sub server-post($data) {
our $cro;
do {
my $r = await $cro.post: "{SERVER-URI}/{DATA-PATH}", body => $data;
my $count = NUMBER-OF-RETRIES;
while $count– and $r.status == 503|401 {
sleep COOLING-OFF-PERIOD;
server-login if $r.status == 401;
$r = await $cro.post: "{SERVER-URI}/{DATA-PATH}", body => $data;
}
await $r.body
}
}

Oh, it ran almost to the end of the data (and it’s fast), but… we are getting some 409s for some records where our csv-to-json is not smart enough, we can ignore those records. And some timeouts.

sub format-error(X::Cro::HTTP::Error $_) {
my $status-line = .response.Str.lines.first;
my $resp-body = do { await .response.body-blob }.decode;
my $req-method = .request.method;
my $req-target = .request.target;
my $req-body = do { await .request.body-blob }.decode;
"ERROR $status-line WITH $resp-body FOR $req-method $req-target WITH $req-body"
}
sub server-post($data) {
our $cro;
do {
my $r = await $cro.post: "{SERVER-URI}/{DATA-PATH}", body => $data;
my $count = NUMBER-OF-RETRIES;
while $count– and $r.status == 503|401 {
sleep COOLING-OFF-PERIOD;
server-login if $r.status == 401;
$r = await $cro.post: "{SERVER-URI}/{DATA-PATH}", body => $data;
}
await $r.body
}
CATCH {
when X::Cro::HTTP::Client::Timeout {
note 'got a timeout, cooling off for a little bit more';
sleep 5 * COOLING-OFF-PERIOD;
server-login
}
when X::Cro::HTTP::Error {
note format-error $_
}
}
}

the result

So, now the whole process goes smoothly and finishes in 20 minutes, circa 100x faster.

Import the data in production… similar results. The process is ongoing, 15 minutes in, the Ops comes (in person):

Why is the server load triple the normal and the number of 5xx is thru the roof?

just five more minutes, check the ticket XXX, closing it now…

(unintelligible noises)

And this is the story of how to import half a million records, that would take two whole days to be imported, in twentysome minutes. The whole ticket took less than a day’s work, start to finish.

related readings

If you want to read more about Raku concurrency, past Advent articles that might interest you are:

Day 6: Immutable data structures and reduction in Raku

For a little compiler I’ve been writing, I felt increasingly the need for immutable data structures to ensure that nothing was passed by references between passes. I love Perl and Raku but I am a functional programmer at heart, so I prefer map and reduce over loops. It bothered me to run reductions on a mutable data structure. So I made a small library to make it easier to work with immutable maps and lists.

A reduction combines all elements of a list into a result. A typical example is the sum of all elements in a list. According to the Raku docs, reduce() has the following signature

multi sub reduce (&with, +list)

In general, if we have a list of elements of type T1 and a result of type T2, Raku’s reduce() function takes as first argument a function of the form

    -> T2 \acc, T1 \elt --> T2 { ... }

I use the form of reduce that takes three arguments: the reducing function, the accumulator (what the Raku docs call the initial value) and the list. As explained in the docs, Raku’s reduce operates from left to right. (In Haskell speak, it is a foldl :: (b -> a -> b) -> b -> [a].)

The use case is the traversal of a role-based datastructure ParsedProgram which contains a map and an ordered list of keys. The map itself contains elements of type ParsedCodeBlock which is essentially a list of tokens.

    role ParsedProgram {
        has Map $.blocks = Map.new; # {String => ParsedCodeBlock}
        has List $.blocks-sequence = List.new; # [String]
        ...
    }
    
    role ParsedCodeBlock {
        has List $.code = List.new; # [Token]
        ...
    }

List and Map are immutable, so we have immutable datastructures. What I want to do is update these datastructures using a nested reduction where I iterate over all the keys in the blocks-sequence List and then modify the corresponding ParsedCodeBlock. For that purpose, I wrote a small API, and in the code below, append and insert are part of that API. What they do is create a fresh List resp. Map rather than updating in place.

I prefer to use sigil-less variables for immutable data, so that sigils in my code show where I have use mutable variables.

The code below is an example of a typical traversal. We iterate over a list of code blocks in a program, parsed_program.blocks-sequence; on every iteration, we update the program parsed_program (the accumulator). The reduce() call takes a lambda function with the accumulator (ppr_) and a list element (code_block_label).

We get the code blocks from the program’s map of blocks, and use reduce() again to update the tokens in the code block. So we iterate over the original list of tokens (parsed_block.code) and build a new list. The lambda function therefore has as accumulator the updated list (mod_block_code_) and as element a token (token_).

The inner reduce creates a modified token and puts it in the updated list using append. Then the outer reduce updates the block code using clone and updates the map of code blocks in the program using insert, which updates the entry if it was present. Finally, we update the program using clone.

    reduce(
        -> ParsedProgram \ppr_, String \code_block_label {
            my ParsedCodeBlock \parsed_block =
                ppr_.blocks{code_block_label};
    
            my List \mod_block_code = reduce(
                -> \mod_block_code_,\token_ {
                    my Token \mod_token_ = ...;
                    append(mode_block_code_,mod_token_);
                },
                List.new,
                |parsed_block.code
            );
            my ParsedCodeBlock \mod_block_ =
                parsed_block.clone(code=>mode_block_code);
            my Map \blocks_ = insert(
                ppr_glob.blocks,code_block_label,mod_block_);
            ppr_.clone(blocks=>blocks_);
        },
        parsed_program,
        |parsed_program.blocks-sequence
    );
    

The entire library is only a handful of functions. The naming of the functions is based on Haskell’s, except where Raku already claimed a name as a keyword.

Map manipulation

Insert, update and remove entries in a Map. Given an existing key, insert will update the entry.

    sub insert(Map \m_, Str \k_, \v_ --> Map )
    sub update(Map \m_, Str \k_, \v_ --> Map )
    sub remove(Map \m_, Str \k_ --> Map )
    

List manipulation

There are more list manipulation functions because reductions operate on lists.

Add/remove an element at the front:

    # push
    sub append(List \l_, \e_ --> List)
    # unshift
    sub prepend(List \l_, \e_ --> List)
    

Split a list into its first element and the rest:

# return the first element, like shift
sub head(List \l_ --> Any)
# drops the first element
sub tail(List \l_ --> List)

# This is like head:tail in Haskell
sub headTail(List \l_ --> List) # List is a tuple (head, tail)

The typical use of headTail is something like:

    my (Str \leaf, List \leaves_) = headTail(leaves);
    

Similar operations but for the last element:

    # drop the last element
    sub init(List \l_ --> List)
    # return the last element, like pop.
    sub top(List \l_ --> Any) ,
    # Split the list on the last element
    sub initLast(List \l_ --> List) # List is a tuple (init, top)
    

The typical use of initLast is something like:

    my (List \leaves_, Str \leaf) = initLast(leaves);
    

Day 5: Malware and Raku

This article has been written by Paula de la Hoz, cybersecurity specialist and artist.

While Raku regex and tokens are meant to work on data structures (such as parsing and validating file types), they can help us to better understand malware. Malware, as any other legit binary, have some signatures within. Some “file signatures” are widely used to blacklist those specific samples (the hashes), but the problem is that blacklisting hashes is not safe enough. Sometimes, the very same kind of malware could be slightly different in small details, and have many different samples related. In this case, apart from relying on dynamic detection (monitoring devices and alerting the user when something seems to be acting suspiciously), genes are also investigated.

Malware genes are pieces of the reversed code (such as strings) that are commonly seen in most or all the samples of a malware family. This sort of genes help researchers identify the malware family and contextualize the attacks , since this is relevant not only to try to put an end to the threat by executing the proper counterfeits in time, but also helps profiling and framing threat actors in some cases.

Generally, these genes are also useful to look for malware families among a unknown group of samples. A common tool for this is “YARA”. YARA is a tool used by researchers to create some rules and basic logic to try to find genes across samples. The structure of how YARA works can also be approached using Raku grammars, providing an alternative that might be useful when the YARA logic is not enough for the regex rules in specific cases. In order to test this idea, I created “CuBu” (curious butterfly), a tool similar to YARA which takes advantage of Raku elements to look for malware genes. For testing out the tool I designed a script to look for Sparkling Goblin genes. Sparkling Goblin is an APT (advanced persistent threat) that I happened to investigate a few months ago. While working on a YARA rule, I found out the following gene was commonly seen in some of their malware:

InterfaceSpeedTester9Calc

So I created a token in Raku using that gene:

my token gen1 {'InterfaceSpeedTester9Calc'}

Now created a regex with it:

my regex sparkling_goblin {<gen1>}

And parsed a file line by line trying to look for the gene:

my $c = 1;
for "$fo/$fi".IO.lines -> $line {
# If the line contains the gene, print it
if $line ~~ &sparkling_goblin {say "Sparkling Goblin found: "; say $line; say "in line $c"; say "in file $fi"; say " "; }
#if $line ~~ &sparkling2 {say "Sparkling Goblin complex regex found: "; say $line; say "in line $c"; say " "; }
$c++;
}

In the code above, the file is parsed in a given folder ($fo) and file ($fi); when the gene is found it prints the name of the file and the line. In this case there are too many steps for a single gene, but let’s check then using another regex from different tokens. Let’s say we also want to check for gene:

ScheduledCtrl9UpdateJobERK

So in this case we can create another token:

my token gen2 {'ScheduledCtrl9UpdateJobERK'}

And change the regex so it checks for one or the other:

my regex sparkling2 {
    [
       <gen1>|<gen2>
    ]
    }

And we can keep going with yet another gene:

my token gen3 {'ScanHardwareInfoPSt'}

And add it in the regex:

my regex sparkling2 {
    [
       <gen1>|<gen2>|<gen3>
    ]
    }

Now let’s say that the first gene is only suspicious when seen in the end of a line, but the second and third genes are suspicious always. We then should use the regex <gen1>$ included in our logic.

my regex sparkling2 {
    [
       <gen1>$|<gen2>|<gen3>
    ]
    }

This is becoming interesting and more specific. If we wanted to check for a line which ends with the first gene, or starts with the second gene we would do:

my regex sparkling2 {
    [
       <gen1>$|^<gen2>
    ]
    }

And if we want to look for a line which is specifically the third gene without anything else or any of the other genes inside the strings:

my regex sparkling2 {
    [
       <gen1>|<gen2>|^<gen3>$
    ]
}

And so on. Once you know your malware you can create more and more refined regex to work with them. You can create more than one regex to look for different specific things. This is how the whole code for the last option would look like:

sub MAIN (Str :$fi = '', Str :$fo = '') {
# some genes in the binary
my token gen1 {'InterfaceSpeedTester9Calc'}
my token gen2 {'ScheduledCtrl9UpdateJobERK'}
my token gen3 {'ScanHardwareInfoPSt'}
my regex sparkling2 {
[
<gen1>|<gen2>|^<gen3>$
]
}
my $c = 1;
for "$fo/$fi".IO.lines -> $line {
if $line ~~ &sparkling2 {say "Sparkling Goblin complex regex found: "; say $line; say "in line $c"; say "in file $fi"; say " "; }
$c++;
}
}

In my tool, CuBu, I used this raku (compiled with rakudo) inside a bash script using Zenity for a simple user friendly GUI that asks for the folder and the raku script and creates a CSV and a raw file with the results. It iterates every single file of the folder:

#!/bin/sh

zenity --forms --title="New analysis" \
	--text="Enter configuration:" \
	--separator="," \
	--add-entry="Folder" \
	--add-entry="Threat name" >> threat.csv

case $? in
    0)
        echo "Configuration set"
	name=$(csvtool col 2-2 threat.csv)
	mv threat.csv* "$name.csv"

	folder2=$(csvtool col 1-1 $name.csv)
	;;
    1)
        echo "Nothing configured."
	;;
    -1)
        echo "An unexpected error has occurred."
	;;
esac

zenity --question \
--text="You are going to check samples in folder $folder2 in order to look for $name. Is that okay?"
if [ $? ]; then
	echo "Starting analysis: "

touch results_$name

	for i in "$folder2"/*; do
		rakudo $name.raku --fi="$i" --fo=. >> results_$name
	done

	zenity --info \
	--text="Info saved in results_$name"
else
	echo "okay! bye!"
fi