Greetings!
Today we will go through this tutorial about writing a simple CRUD service using Cro. For the impatient ones, link to the sources is at the end of the post.
Why would I want to read this piece of text and code?
- A Cro::HTTP usage for a server-side application with authentication + authorization and a CRUD resource serving
- Cro::WebApp templating usage
- Cro::HTTP::Test usage
- Setting up the services: Docker, nginx reverse proxy
Why would I want to read something else today?
- An over-simplified mock in-memory database is used. Use whatever tool you find suitable for a reliable solution.
- Project complexity is reduced to bare minimum for a server-side application: no smart javascript on the client, no user-friendly UX patterns.
- This post covers a lot of basics and is not intended towards experienced users.
Let’s go let’s go let’s go
So we are writing a collective blog.
Users can register, login and logout. They can create new posts, see posts, edit and delete their posts.
Let’s start by stubbing a new project using Cro command line tool:
➜  CommaProjects> cro stub http rest-blog ./rest-blog
Stubbing a HTTP Service 'rest-blog' in './rest-blog'...

First, please provide a little more information.

Secure (HTTPS) (yes/no) [no]:
Support HTTP/1.1 (yes/no) [yes]:
Support HTTP/2.0 (yes/no) [no]:
Support Web Sockets (yes/no) [no]:
➜  CommaProjects> cd rest-blog/
As usual, we also want to initialize a git repo for our project:
$ git init
$ git add .
$ git commit -m 'Initial commit'
Let’s look at the structure of the created stub:
libdirectory contains sources for the application itself. Right now, it only has a sample router with a single route declared.META6.jsoncontains description of our project.service.p6describes how to start our service. By default, it starts a Cro server on host and port specified by environment variables and serves requests until the user sends Ctrl-C.
To start the application, service.p6 can be run directly, but it is more flexible to edit .cro.yml file, which describes one or more services this project consists of. There, service.p6 is specified as a path for the entrypoint, so Cro command line tool runs the script according to the config for you.
Let’s try it out:
➜  rest-blog git:(master) ✗ cro run .
▶ Starting rest-blog (rest-blog)
🔌 Endpoint HTTP will be at http://localhost:20000/
📓 rest-blog Listening at http://localhost:20000
📓 rest-blog [OK] 200 / - ::1
As the service is up, you can visit localhost:20000 in your browser and see Cro’s Lorem Ipsum.
As everything is set, let’s digging in.
Database
Let’s start with writing Blog::Database class. We create a file Database.pm6 in new directory lib/Blog, so that the full path is lib/Blog/Database.pm6. If you are using Comma IDE, the process is even simpler. Don’t forget to add new entry to provides section of META6.json file. We will deal with users and posts:
#| A mock in-memory database.
class Blog::Database {
    has %.users;
    has %.posts;

    ...
}
As you see, users and posts are defined as hashes. The contents will be:
- User contains: user ID, username, password
- Post contains: post ID, title, body, ID of author and date of creation
As for users, we need a way to add a user (registration), obtain a user by ID (from a session) or by username (on login). Not so much here:
method add-user(:$username, :$password) {
    my $id = %!users.elems + 1;
    %!users{$id} = { :$id, :$username, :$password }
}

multi method get-user(Int $id) { %!users{$id} }

multi method get-user(Str $username) { %!users.values.first(*<username> eq $username) }
We use current hash size to produce new IDs, and getters are implemented as trivial operations on the hash.
Posts are our CRUD resource, so we want to have more methods:
- Create
method add-post(:$title, :$body, :$author-id) {
    my $id = %!posts.elems + 1;
    %!posts{$id} = { :$id, :$title, :$body, :$author-id, created => now }
}
- Read
method get-post(UInt $id) { %!posts{$id} }
- Update
    method update-post($id, $title, $body) {
        %!posts{$id}<title> = $title;
        %!posts{$id}<body> = $body
    }
- Delete
method delete-post($id) { %!posts{$id}:delete }
With this under our belt, we can proceed.
Auth
There are plenty of articles explaining the authorization vs authentication topic, so here we will look at how it works from the Cro user perspective.
Firstly, we need to define a Session class. A session holds the current data about the user on the server-side. For each new client, our service creates a new session object and sends back to the client a special “key” (session ID), saying “This is your session key, don’t you dare to drop it somewhere!”. Thus, the client knows nothing about its particular session, but it knows how to say “I want this page, oh, and by the way, here is the key you gave me, maybe there will be more candies just for me!”.
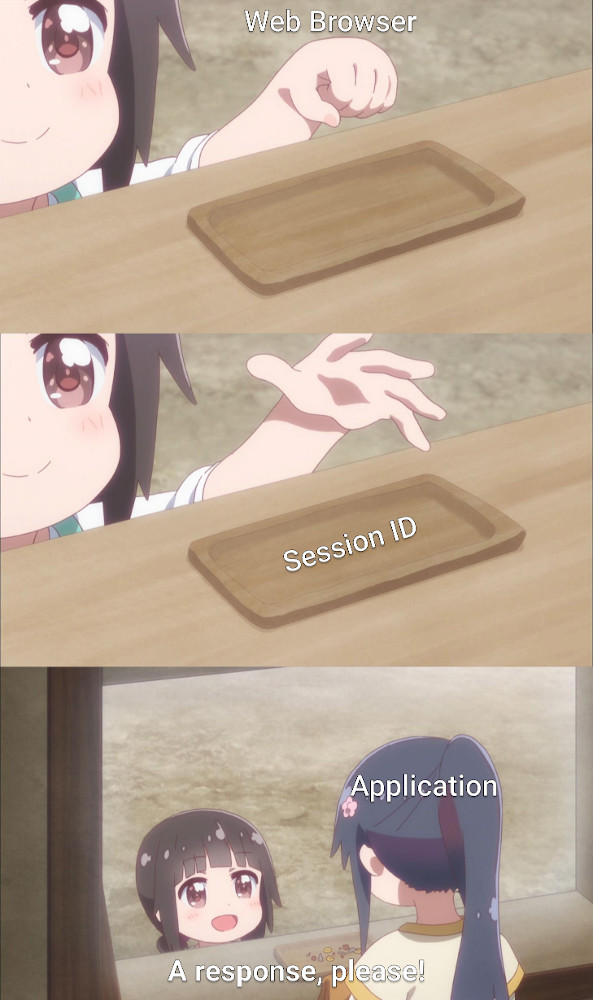
The server knows how to correspond keys to particular session objects and can decide what to do with the request based on its data.
Let’s define a very simple session class in Blog::Session:
use Cro::HTTP::Auth;

class Blog::Session does Cro::HTTP::Auth {
    has $.user-id is rw;

    method logged-in { $!user-id.defined }
}

subset LoggedIn of Blog::Session is export where *.logged-in;
Our class has to do Cro::HTTP::Auth role to be recognized by Cro as a session holder class. We also store user’s ID in an attribute and provide a method to check if the user is logged in: if the user has an ID, then this is definetely not some anonymous lurking around.
We also provide a handy subset for the created type (LoggedIn is a subset of Blog::Session where logged-in method returns True).
There are different ways to set “keys” (cookies, headers etc) and Cro supports various setups as well (in-memory storage, persistent storage, redis storage, more can be added), but for the sake of simplicity we will use in-memory, cookiebased session support.
So, secondly, How do we enable it? Our server takes a request from the network, parses it, then passes it for processing, and a response is sent back. Somewhere in-between we need to add something that will:
- For new users, create a session and add “This is your key, brave one!” to the response
- For users with keys, retrieve a session and tell “This is a session data of the user!” to the router
There are numerous places where we can add such a piece of software working in the middle, such a middleware.
First “normal” place is server-level, second “normal” place is route-level. There are different pros and cons for them, but this time we will go to service.p6 and add one to our server:
...
    application => routes(),
    before => [
        Cro::HTTP::Session::InMemory[Blog::Session].new(
                expiration => Duration.new(60 * 15),
                cookie-name => 'XKHxsoOwMNdkRrgqVFaB');
    ],
    after => [
...
Don’t forget to import our Blog::Session class.
Along with other options passed to Cro::HTTP::Server constructor, such as host, port and application to serve, we specify before argument containing a list of middleware we want to apply. We configure Cro::HTTP::Session::InMemory with our session class as a type parameter, saying “I want to work with session objects of this type”. We also specify name of the cookie and when it expires so the user needs to login again. The expiration period is reset on every new request from the user, so the users actively browsing a site won’t see a sudden “Login” page.
Why are we adding it on server-level instead of router-level? It’s a Surprise Tool that will help us later!
While we are in service.p6, it would be handy to create an application-wide database and pass it to our router.
Create a new Blog::Database object and pass it to routes subroutine, along with that patching its signature to have a parameter. In a more complex application we can connect to a persistent database here, do various checks etc.
Now it is finally time to write some router code!
Routing: Principles
In our application we have two modules, Auth and Blog, which are responsible for authentication and blogging features respectively. While they are not too big by itself, we will separate them into different modules for demonstrative purposes.
As described in an article about The Cro Approach, a Web application built with Cro::HTTP is just a bi-directional pipeline from “network input” into “network output”. All the underneath business like parsing is done for the user already.
When a pipeline is set up (which is done with the Cro::HTTP::Server usage in service.p6 entry point) and the middleware is in place, the “core” of our application is a router.
Speaking from a high-level point of view, a router is something that takes requests and emits responses.
One can write a router whatever way is suitable as long as the constraints are met, but for most applications using a handy route subroutine and bunch of helper subroutines is more than enough to get stuff done.
As you can see in the stub project we have, our Blog::Routes module already contains a single sample route that serves a dummy we saw before.
To make our application useful, we will add more routes. For detailed description of API refer to Cro::HTTP::Router documentation.
Routing: The Beginning
I like my modules to be kept in order. As we are writing a blog app, naturally the blog router should be in Blog::Routes module, but the stub greets us with just Routes. Just move the file into a new directory and adjust META6.json data (or just drag and drop the file if using Comma).
Now, let’s adjust its contents:
use Cro::HTTP::Router;

sub routes($db) is export {
    route {
        after { redirect '/auth/login', :see-other if .status == 401 };

        get -> 'css', *@path {
            static 'static-content/css', @path
        }
    }
}
We replaced default route with a couple of lines.
The call to after subroutine with a block adds a new middleware on a router level. For each response the block is executed with it being a topic, and the middleware checks status code of a response. If it is 401 (Unauthorized), we set a redirect to our (future) login page.
The second subroutine call is a definition of route that will serve static content – our CSS files. For our HTML pages to look less sad, we’ll use Bootstrap toolkit, so we create create static-content/css directory in project’s root and add the bootstrap.min.css file there. The file can be obtained from official Bootstrap framework page, various CDN services or whatever way you might want to serve styles. Of course, the layout is up to you and it is nowhere near necessary.
Routing: The Auth
Let’s create a new router for auth-related routes.
Create Blog::Routes::Auth module with auth-routes subroutine declared, which returns a result of route call:
use Cro::HTTP::Router;

sub auth-routes(Blog::Database $db) is export {
    route {
        # Routes will be here!
    }
}
It has no routes for now, but we already can include it into our “main” router. Let’s add it into Blog::Routes module:
use Blog::Routes::Auth;

sub routes(Blog::Database $db) is export {
    route {
        ...
        include auth => auth-routes($db);
        ...
    }
}
To include a router we use include, which should be easy enough to remember!
If this call looks like a magic, we can rewrite it as:
include(auth => auth-routes($db));
Which is just a call with a named argument. The key can be a string or a list of strings, and defines a prefix for each route from the router included. The value is just a call to our auth-routes, which creates a new router.
We also pass the $db argument, as we certainly want to work with our models in routes of the new router.
Before a jump into the routers implementation, we have one more question to look at…
Cro::WebApp template
Cro::HTTP is not a web framework. But it can be one. How?
It gives you ability to respond to HTTP requests, and does not tie you with its own decisions about “How” you do that.
- Do you want to model your data? Just model it Whatever the way you want.
- Do you want to serve HTML to your users? Just prepare it Whatever the way you want.
- Do you want to work with requests and responses? Leave this to Cro::HTTP!
The one thing we did not discuss yet is HTML templating. Indeed, aside from getting request data from our users, we need to greet them with some nice pages before. To do this, we will use Cro::WebApp module.
It is a templating engine with syntax close to Raku, thus needs some time to get used to it. It is very recommended to glance over its documentation page before reading the templates code.
The templates code is deliberately not included in this post for numerous reasons (nobody likes boring HTML and everybody likes templating even less), but is available in the code repo.
Routing: The Auth Strikes Back.
Our registration page URL will look like /auth/register. It accepts GET and POST requests. Finally, the code:
sub auth-routes(Blog::Database $db) is export {
    route {
        get -> Blog::Session $session, 'register' {
            template 'register.crotmp', { :logged-in($session.user-id.defined), :!error };
        }

        post -> Blog::Session $session, 'register' {
            request-body -> (:$username!, :$password!, *%) {
                with $db.get-user($username) {
                    template 'register.crotmp', { error => "User $username is already registered" };
                } else {
                    $db.add-user(:$username, :password(argon2-hash($password)));
                    redirect :see-other, '/auth/login';
                }
            }
        }
        ...
    }
}
The first call to get creates a handler for GET request to /auth/register URL. The auth piece is a default prefix in this router, as we specified it as a named argument on inclusion.
It calls template from Cro::WebApp module to render our template with the data specifies in second argument. The first argument to the handler block, $session, is not related to URL pieces and specifies that this handler needs a session object for this user to handle.
The second route is for POST request to the same URL. It uses request-body to unpack form data into variables. Next lines check if the user already exists, and present an error in this case, and otherwise create a new user. Don’t forget to hash the password! When new user account is created, we set a redirect to the login page.
The request-body is smart enough to without any changes parse a request data based on content type, be it json, plain form, multipart form data or whatever content type you can implement a handler for.
Login page is very similar: GET returns a template, POST collects data and processes it, with a twist:
post -> Blog::Session $session, 'login' {
    request-body -> (:$username!, :$password!, *%) {
        my $user = $db.get-user($username);
        with $user {
            if (argon2-verify($_<password>, $password)) {
                $session.user-id = $_<id>;
                redirect :see-other, '/';
            } else {
                template 'login.crotmp', { :!logged-in, error => 'Incorrect password.' };
            }
        } else {
            template 'login.crotmp', { :!logged-in, error => 'Incorrect username.' };
        }
    }
}
While almost everything is similar and thus not so hard to grasp, we can see that this route handler actually uses $session object to assign a user ID on login.
Nothing else need to be done, Cro::HTTP will take care of preserving this session in a storage and on next requests from this user, given the session key is passed, the handler will be able to check if the user is logged in and if yes, what’s the ID.
Everything else here is typical: request-body to parse a form, template, redirect and Raku code.
As for logging out, the code is pretty short as well:
get -> Blog::Session $session, 'logout' {
    $session.user-id = Nil;
    redirect :see-other, '/';
}
Here, we can erase the session object data whatever the way we want, and then redirect.
Routing: The Blog
Aside from writing boring templates, now we should have a simple application with an ability to create new users and log in.
But when the users are redirected to index page of our site, a sad error welcomes them. Let’s make it more welcoming!
This calls for a new module, Blog::Routes::Blog.
Once again, include it into our main router with a simple:
use Blog::Routes::Blog;
...
include blog-routes($db);
Note that we don’t pass a named argument. The reason is that while we want blog-related routes to be served under /blog prefix, this router will also handle index page, /, without a prefix. Instead, we can do a simple trick later.
At index page we show posts of all users. Firstly, we need to define a method on our Blog::Database to collect all info we need:
method get-posts {
    %!posts.values.map({
        $_<username> = %!users{$_<author-id>}<username>;
        $_;
    }).sort(*.<created>);
}
While it may look a bit cryptic, in fact we just imitate SQL JOIN clause, because we want to show author’s username along with the post, not just ID.
It can be read this way:
- For
%!postshash, take all values => - For each value, which is a hash itself, add a new item =>
- The item key is
username, the item value is ausernamevalue of%!usersitem obtained byauthor-idkey that is stored in the post records => - We don’t use explicit return, and implicitly a last result of block execution is returned. As assignment of a new hash key returns value of assigned item instead of hash, we need a single
$_;to return the hash => - Sort all entries by their creation date.
With this in our hands we can write a handler for the index page. Alas, nothing interesting awaits us there:
get -> Blog::Session $session {
    my $user = $session.logged-in ?? $db.get-user($session.user-id) !! {};
    $user<logged-in> = $session.logged-in;
    my $posts = $db.get-posts.map({
        $_<created> = Date.new($_<created>).Str;
        $_;
    });
    template 'index.crotmp', { :$user, :$posts };
}
With the session object available and our mighty database, we gather the data and push it into a template. Nice!
As we have R part of CRUD now, we need to plan the rest (not The REST this time!): create, edit and deletion.
The URL for each action will start with /blog prefix. Do we need to create another router module to not write out this annoying prefix for each route handler? Maybe yes, but maybe not. For this case, let’s just inline include. Or was it include inline?
Whatever the way it is:
include <blog> => route {
    get -> ...
    post -> ...
}
As we just called our *-routes subroutines, we can just omit this layer of indirection, sacrificing four spaces of indentation.
(by the way, there is no obligation for the *-routes naming scheme usage, but it is easy to remember and use)
After looking at register route handler, the post creation one is typical: get will serve a template with a form, while post will parse the form with request-body, do a call to DB to save the post and make a redirect.
The next two routes are update and delete. Let’s write them up:
post -> LoggedIn $session, UInt $id, 'update' {
    with $db.get-post($id) -> $post {
        if $post<author-id> == $session.user-id {
            request-body -> (:$title!, :$body!) {
                $db.update-post($id, $title, $body);
                redirect :see-other, '/';
            }
        } else {
            forbidden;
        }
    } else {
        not-found;
    }
}

post -> LoggedIn $session, UInt $id, 'delete' {
    with $db.get-post($id) -> $post {
        if $post<author-id> == $session.user-id {
            $db.delete-post($id);
            redirect :see-other, '/';
        } else {
            forbidden;
        }
    } else {
        not-found;
    }
}
Note we used LoggedIn subset as a type for the $session object. During routing a request, its session object will be checked to met the requirement (in this case, for the user to be logged in) and if not, Unauthorized response will be formed.
Now look at the code closely, I am seeing it’s coming…
When in Rome, do as the Romans do, they say, and, indeed, when writing code in Raku THIS insane amount of boilerplate is just ridiculous! I demand the gods and goddesses and even Santa Claus himself we want and can do better than this!
And with the language and libraries brought to us by awesome contributors from all around the globe, let’s make it neater:
#| A helper for executing code blocks
#| only on posts one can access
sub process-post($session, $id, &process) {
    with $db.get-post($id) -> $post {
        if $post<author-id> == $session.user-id {
            &process($post);
        } else {
            forbidden;
        }
    } else {
        not-found;
    }
}
Let’s take a session, $id of the post and the action to do. If the post exists, check if the user has rights to modify it. All’s ok? Execute the code! Something is wrong? Notify the user about that!
Now we can re-write the POST routes above as:
post -> LoggedIn $session, UInt $id, 'update' {
    process-post($session, $id, -> $ {
        request-body -> (:$title!, :$body!) {
            $db.update-post($id, $title, $body);
            redirect :see-other, '/';
        }
    });
}

post -> LoggedIn $session, UInt $id, 'delete' {
    process-post($session, $id, -> $ {
        $db.delete-post($id);
        redirect :see-other, '/';
    });
}
Even now I want to discuss with Santa if it is worth anything to factor out the redirect call into our helper subroutine. My answer: nope.
The point, hopefully, taken here, is that one can flexibly factor out the logic of processing requests. And roles in application. And cookies. Om-nom-nom.
Setting nginx as a reverse proxy
Let’s say you want to hide your application behind an nginx reverse proxy. Be it load balacing, free caching or something else, there are reasons to do it. As the application we made can be served using its native tools, there are not so much configuration to be done to achieve this.
The prerequisite for this is to have nginx installed on your server.
As a next thing, you run it using the Cro command line tool runner, and armed with a port to work with, you can modify the server section of your nginx config (in the simplest case, the location on GNU/Linux systems is /etc/nginx/nginx.conf):
server {
    listen       80;
    server_name  localhost;

    location / {
        proxy_pass http://localhost:20000/;
    }
    ...
}
As a next step, you check the resulting config is correct using nginx -t command and reload the server using nginx -s reload.
Given your application is up and running, you should be able to visit localhost and see the main page.
A lot of other things might be done: to write a unit for easy managing your service in case of failures or machine rebootes, your nginx config might be much more interesting, as well as HTTPS support might be added (which is highly recommented) as our service has auth pieces and sending the password over plain HTTP is dangerous.
Building a docker image
So services are cool, but the thing everyone talks about now is Docker and Kubernetes. Care to containerize your app? Think of a nice name and execute this command using it in the root directory of your project:
docker build -t $my-cool-app-name-here .
That’s all! A container is prepared for you and you can manage it as you wish.
Conclusions
In this rather long tutorial we discussed some basic topics:
- Structure for a small-to-medium Cro application.
- Authorization and authentication parts in general and implementation-specific examples.
- Implementation of commonly written route handlers.
- Serving and deploying of your application.
Of course, there are many more features available along with cool tricks, yet this goes far beyond this already long post.
The full sources including templates are available here.
Congratulations on finishing this tutorial! As December came, I wish you to have a hot drink and a nice day.

Very helpful, thanks!
LikeLike
This is by and far the most impressive introduction to Cro that exists. Bravo — I’ll have this bookmarked for all my projects to come.
LikeLike